Covered Porches vs Open Porches – Which One is Best for You?
Imagine starting your day with a cup of coffee on a porch that perfectly complements your lifestyle be it a cozy covered porch or an open-air design. Selecting the appropriate porch type is more than a design choice; it’s about enhancing your home’s functionality, value, and comfort.
This guide delves into the distinctions between covered and open porches, examining their benefits and drawbacks. We’ll provide expert insights to assist you in making an informed decision for your home, whether you’re embarking on new construction or a remodeling project.
What Are Covered Porches and Open Porches?
Covered Porches
A covered porch is a roofed structure attached to your home, offering protection from various weather conditions. It serves as an extension of your living space, suitable for outdoor dining, lounging, or even as a home office. Covered porches are ideal for homeowners seeking to enjoy their outdoor areas year-round, regardless of the weather.
Key Features:
- Roofed structure with support beams or columns.
- Options for screens, glass enclosures, or open sides.
- Seamless integration with the home’s architecture.
Open Porches
An open porch is an uncovered outdoor space that connects you directly with nature. It’s an excellent choice for those who appreciate an open-air experience and prefer a simpler, more cost-effective structure. Open porches are particularly suitable for regions with mild climates where weather protection is less critical.
Key Features:
- Absence of a roof, though partial shade structures like pergolas can be included.
- Minimalist design that harmonizes with landscaping.
- Ideal for sunbathing, stargazing, or enjoying a breeze.
Covered Porches vs. Open Porches – Key Differences
1. Protection from Weather
Covered porches provide shelter from rain, snow, and harsh sunlight, making them usable in all seasons. Open porches, while beautiful, are exposed to the elements, limiting their use during bad weather.
Pro Tip: If you live in an area with extreme weather conditions (e.g., heavy snowfall or intense sun), a covered porch is a more practical choice.
2. Usability and Functionality
Covered porches are versatile spaces that can serve as outdoor living rooms, dining areas, or even home offices. Open porches are more casual, ideal for relaxing or entertaining on warm days.
Pro Tip: Consider how you plan to use the space. If you want a multi-functional area, a covered porch is the way to go.
3. Aesthetic Appeal
Covered porches add architectural depth to your home, often enhancing its curb appeal. Open porches offer a minimalist, natural look that blends seamlessly with your landscaping.
Pro Tip: Match your porch style to your home’s architecture. For example, a farmhouse-style home pairs well with a covered porch, while a beach house might suit an open porch.
Pros and Cons of Covered Porches
Pros:
- Year-Round Use: Enjoy in any season, rain or shine.
- Added Value & Curb Appeal: Enhances aesthetics and resale value.
- Versatile Space: Ideal for dining, lounging, or remote work.
- Weather Protection: Shields from UV rays, rain, and snow.
- Longer-Lasting Furniture: Reduces wear and tear on outdoor furnishings.
- Screening Option: Can be enclosed to keep out insects
Cons:
- Higher Cost: Typically $10,000–$30,000, depending on materials and size.
- Maintenance Needs: Requires regular cleaning and inspection.
- Permit Requirements: May involve additional paperwork and costs.
- Reduced Natural Light: Can make adjacent indoor spaces darker.
Pros and Cons of Open Porches
Pros:
- More Affordable: Generally costs $5,000–$15,000.
- Open-Air Experience: Offers direct connection with nature.
- Lower Maintenance: No roof, gutters, or structural upkeep.
- Aesthetic Appeal: Blends seamlessly with landscaping.
- Fewer Permit Requirements: Often easier to build.
Cons:
- Weather Exposure: No protection from rain, sun, or snow.
- Less Privacy: More visible to neighbors and passersby.
- Furniture Wear: Outdoor furniture is fully exposed to elements
Which Porch Type is Best for Your Home?
When choosing between a covered porch and an open porch, consider the following factors:
1. Climate: If you live in an area with harsh weather conditions, such as heavy rain, snowfall, or intense heat, a covered porch is a better option. For regions with mild weather, an open porch can be a great way to enjoy the outdoors.
2. Budget: Covered porches generally require a higher upfront investment but can offer greater long-term value by increasing your home’s resale potential. Open porches are more budget-friendly but may require additional upkeep due to weather exposure.
3. Lifestyle Needs: Do you want an all-season entertainment space or a simple outdoor area for relaxation? If you prefer a versatile, shaded area that can be used for multiple activities, a covered porch is the best choice. If you love an unobstructed view of the outdoors and a more minimalistic setup, an open porch may be the way to go.
4. Aesthetic Preferences: Covered porches add architectural interest and integrate with the home’s overall design, while open porches provide a natural, airy look that seamlessly blends with landscaping.
Maintenance Tips for Covered and Open Porches
No matter which porch type you choose, regular maintenance will keep it looking beautiful and functional for years.
Covered Porch Maintenance:
- Clean gutters and roofing to prevent water buildup and potential damage.
- Inspect for leaks or structural wear annually and repair as needed.
- Seal and stain wooden components every 2–3 years to protect against moisture and UV exposure.
- Check for mold or mildew growth, especially in humid climates.
Open Porch Maintenance:
- Sweep and clean debris regularly to maintain a tidy appearance.
- Seal and stain wooden floors annually to prevent warping or cracking.
- Inspect railings and flooring for any signs of damage or deterioration.
- Protect outdoor furniture with weather-resistant covers or move it inside during extreme weather conditions.
Conclusion: Making the Right Choice
Choosing between a covered porch and an open porch ultimately depends on your personal needs, budget, and climate considerations. A covered porch provides year-round usability, enhanced home value, and versatile functionality, making it ideal for homeowners looking for a long-term investment. Meanwhile, an open porch offers a cost-effective, low-maintenance option that embraces outdoor living.
Still unsure which porch type is best for your home? Consulting with a professional contractor like Best Enterprises General Contracting can help you make an informed decision based on your home’s design and your personal preferences. With expert guidance, you can create a beautiful, functional outdoor space tailored to your needs.
Start planning your dream porch today with Best Enterprises General Contracting—your trusted partner in home improvement!
Top Kitchen Remodeling Trends Transforming Homes in 2025
Imagine walking into a kitchen that’s not just a place to cook but a hub of sustainability, technology, and style welcome to 2025’s kitchen remodeling trends. As kitchens continue to evolve into multifunctional spaces for cooking, dining, and socializing, staying ahead of the latest trends is essential for homeowners planning a remodel.
In this article, we’ll explore the top kitchen remodeling trends transforming homes in 2025, offering actionable insights, expert guidance, and real-world examples to help you create a kitchen that’s both functional and stylish. Whether you’re planning a full renovation or a simple update, these trends will inspire you to reimagine your space.
Why Kitchen Remodeling Trends Matter in 2025
Kitchens are no longer just functional spaces, they’re the heart of the home. In 2025, kitchen design is all about sustainability, technology, and personalization. According to a 2023 survey, 78% of homeowners prioritize kitchen remodels for increasing home value, making it one of the most impactful home improvement projects. From eco-friendly materials to smart appliances, the trends of 2025 are designed to enhance both the functionality and aesthetics of your kitchen.
1. Sustainable Kitchen Design: Eco-Friendly and Stylish
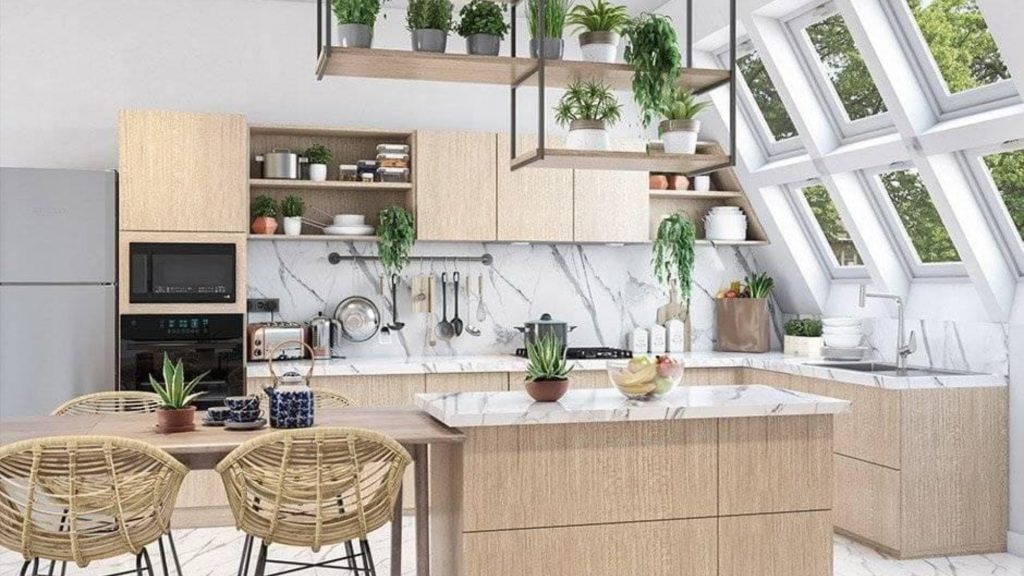
Sustainability is no longer a niche trend, it’s a necessity. In 2025, homeowners are embracing eco-friendly materials like reclaimed wood, recycled glass, and low-VOC paints. Energy-efficient appliances and water-saving fixtures are also gaining popularity, helping reduce both environmental impact and utility bills. For example, a recent project by Best Enterprises used bamboo cabinetry and quartz countertops, combining durability with eco-friendliness. These materials not only look stunning but also contribute to a healthier planet.
A sustainable kitchen design helps lower environmental impact by reducing waste and energy consumption. It also leads to long-term cost savings, as energy-efficient appliances can cut utility bills by up to 30%. Additionally, eco-conscious features increase home value, making properties more attractive to buyers. To create a green kitchen, homeowners can replace old appliances with ENERGY STAR-rated models, opt for locally sourced materials, and install water-saving faucets and LED lighting for added efficiency.
2. Smart Kitchen Innovations: Technology Meets Functionality
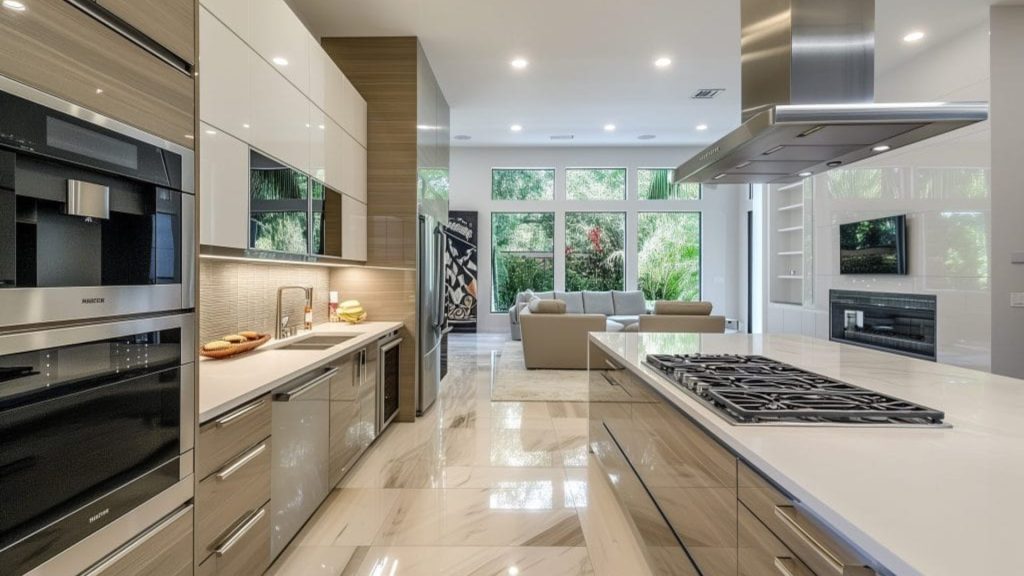
Smart kitchens are revolutionizing the way we cook and interact with our spaces. In 2025, Wi-Fi-enabled ovens, smart refrigerators with inventory tracking, and voice-controlled faucets are becoming mainstream. These innovations not only improve convenience but also enhance efficiency. For instance, a smart refrigerator can alert you when you’re running low on groceries, while a voice-controlled faucet can measure precise amounts of water for recipes.
Smart storage solutions, such as motorized cabinets, pull-out pantry systems, and app-controlled lighting, are transforming kitchen organization. A recent project by Best Enterprises incorporated a smart kitchen system that reduced energy usage by 20%, proving that technology can be both functional and sustainable. When planning a smart kitchen, experts recommend prioritizing devices that integrate seamlessly with your existing smart home ecosystem for maximum efficiency.
3. Multifunctional Kitchen Islands: The Heart of the Kitchen
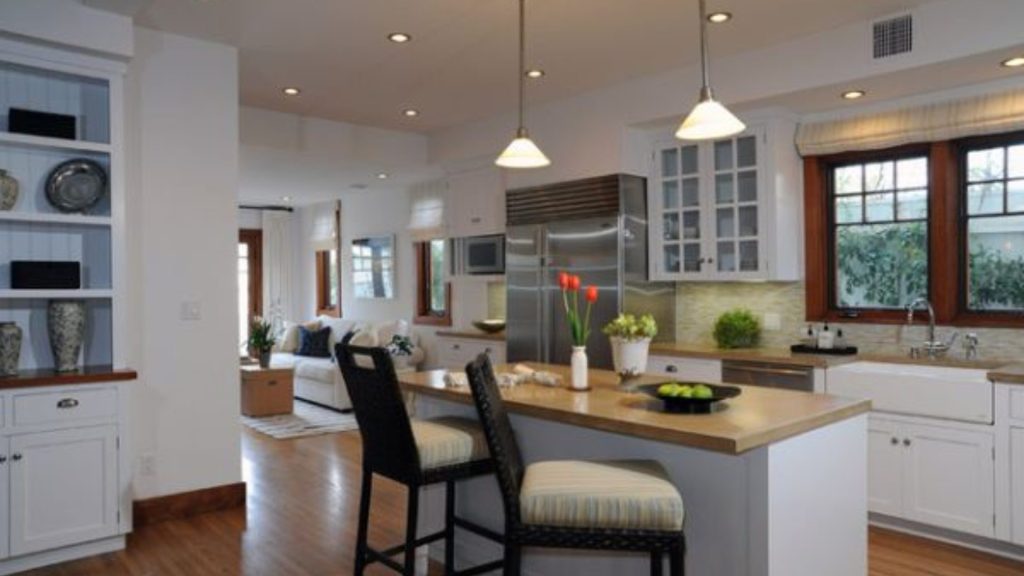
Kitchen islands are no longer just for prep work; they’re becoming the focal point of the kitchen. In 2025, expect to see islands with built-in storage, seating, and even appliances like sinks or wine coolers. A well-designed island can serve multiple purposes, from meal preparation to casual dining and even work-from-home setups.
For smaller kitchens, a fold-down island can double as a dining table, maximizing functionality without sacrificing space. Homeowners can also incorporate hidden storage within islands to keep kitchen essentials neatly tucked away. As an expert tip, designers suggest planning islands with flexibility in mind to accommodate changing needs over time.
4. Bold Colors and Personalized Aesthetics
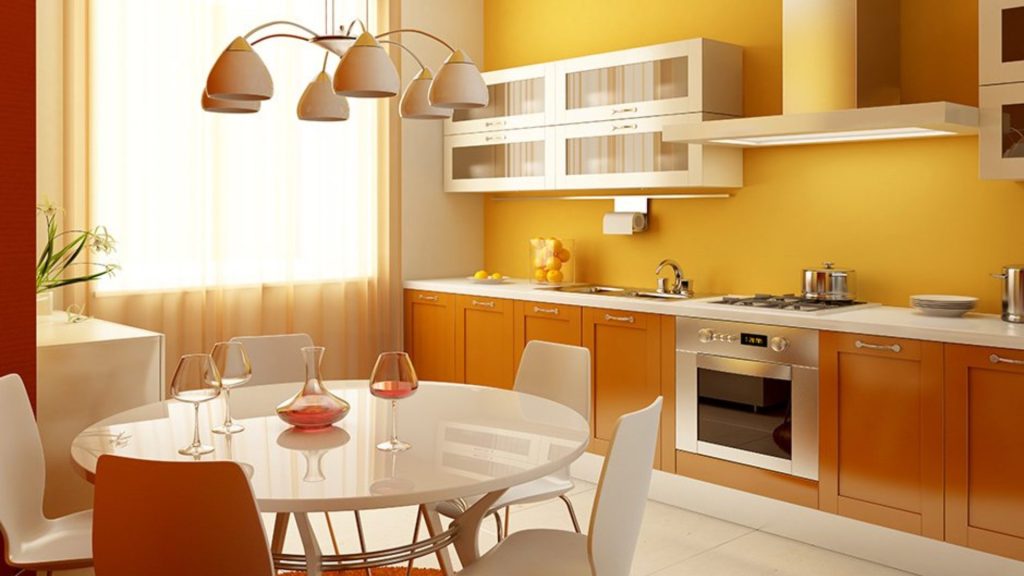
Neutral kitchens are taking a backseat as homeowners embrace bold colors like deep blues, emerald greens, and matte black. These hues add personality and depth to kitchen spaces while making a strong visual impact. Additionally, mixing materials such as wood, metal, and stone creates dynamic and visually interesting designs.
Personalization is another key trend, with homeowners opting for custom cabinetry, unique backsplashes, and statement lighting to reflect their individual styles. A recent remodel featured navy blue cabinets with brass handles, creating a striking yet elegant aesthetic. This shift toward bolder design choices allows homeowners to create kitchens that feel both modern and timeless.
5. Open Shelving and Minimalist Design
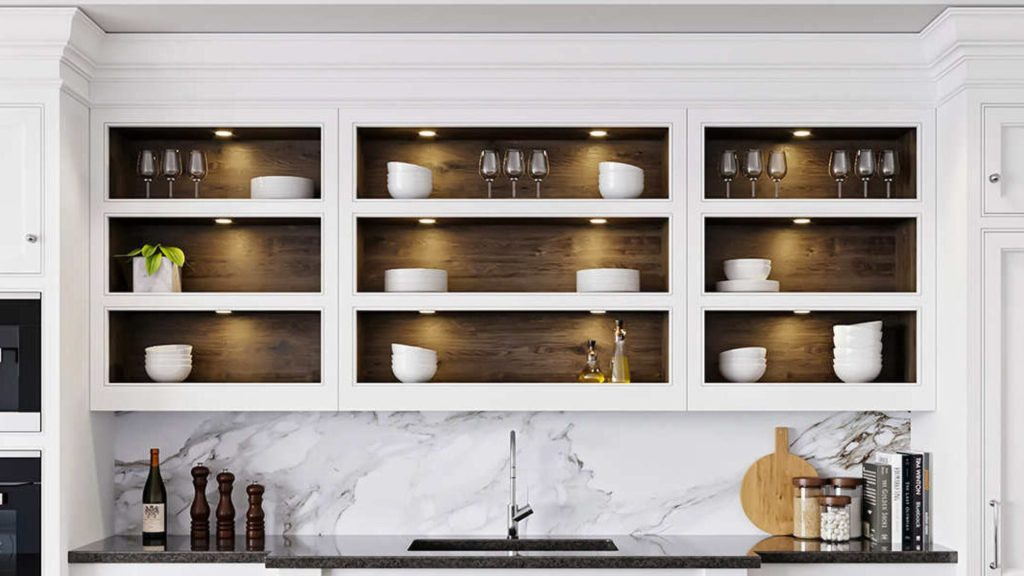
Minimalist kitchens are gaining popularity in 2025, with open shelving replacing traditional upper cabinets. Open shelves create a sense of openness and allow homeowners to display decorative items, fine dishware, or everyday essentials in an organized manner. Floating shelves, in particular, offer a sleek, modern look while maintaining functionality.
Minimalist design focuses on clean lines and hidden storage, keeping countertops clutter-free. By incorporating streamlined cabinetry, handle less drawers, and integrated appliances, homeowners can achieve a contemporary aesthetic without sacrificing usability. To maintain a minimalist look, experts recommend prioritizing functional storage solutions and keeping frequently used items within easy reach.
6. Mixed Materials and Textures
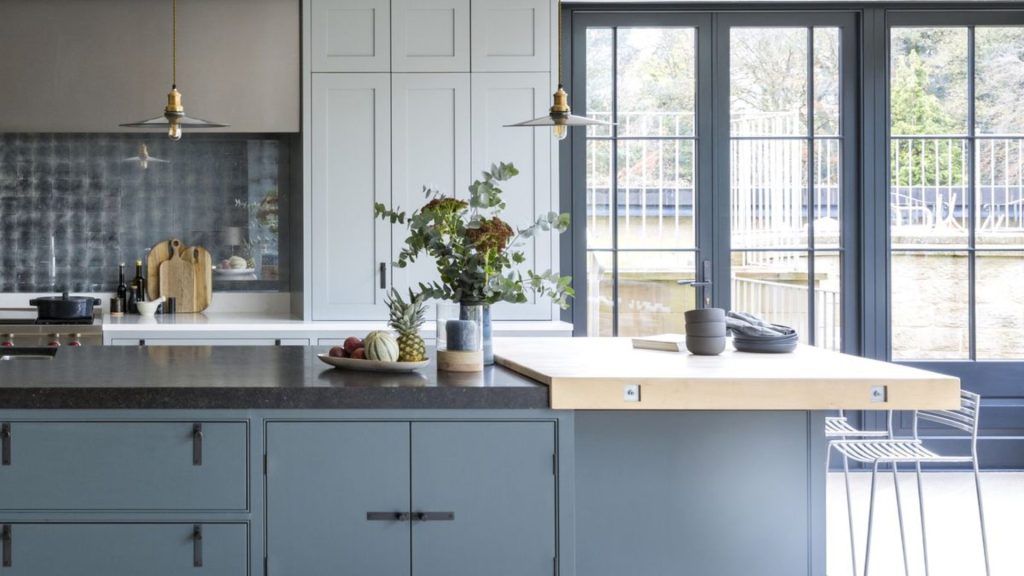
Mixing contrasting materials like wood, metal, and stone adds depth and visual interest to a kitchen. For instance, a marble countertop paired with a matte black backsplash creates a striking yet cohesive look. Textured finishes, such as brushed metals or natural stone backsplashes, enhance the overall design by adding a layer of sophistication.
Incorporating a variety of textures allows homeowners to create a balanced yet visually appealing kitchen. Some popular combinations include pairing warm wood tones with cool metallic, using matte and glossy surfaces together, or introducing tactile materials like concrete and quartz. These combinations not only enhance aesthetics but also contribute to a more engaging and dynamic kitchen environment.
Conclusion: Transform Your Kitchen with 2025 Trends
Incorporating these 2025 kitchen remodeling trends can transform your space into a functional, stylish, and sustainable hub of your home. Whether you’re planning a full renovation or a simple update, these insights will help you make informed decisions. From smart kitchen innovations to bold color choices and eco-friendly designs, the possibilities for enhancing your kitchen are endless.
Ready to transform your kitchen? Contact Best Enterprises General Contracting today for a free consultation!
Top 10 Bathroom Maintenance Tips to Keep Your Space Looks New
Your bathroom is one of the most-used spaces in your home keeping it in top shape doesn’t have to be a chore! Whether you’re a home remodeling enthusiast or simply looking to maintain a fresh, clean space, regular bathroom maintenance is key. In this guide, we’ll explore 10 essential bathroom maintenance tips to help you prevent costly repairs, extend fixture life, and keep your bathroom clean and hygienic.
In this guide, we’ll walk you through 10 essential bathroom maintenance tips, from cleaning hacks to preventing mold and water damage. Let’s dive in!
1. Regular Cleaning and Disinfection
Bathrooms are prone to the accumulation of bacteria, mold, and mildew due to their moist environment. Implementing a weekly cleaning routine is crucial. Focus on high-touch surfaces such as faucets, handles, countertops, and light switches. Use EPA-registered disinfectants to effectively eliminate pathogens. For a natural cleaning solution, mix equal parts water and white vinegar; this mixture can effectively clean various surfaces. Always ensure proper ventilation during and after cleaning to allow surfaces to dry completely, reducing the risk of mold growth.
2. Mold and Mildew Prevention
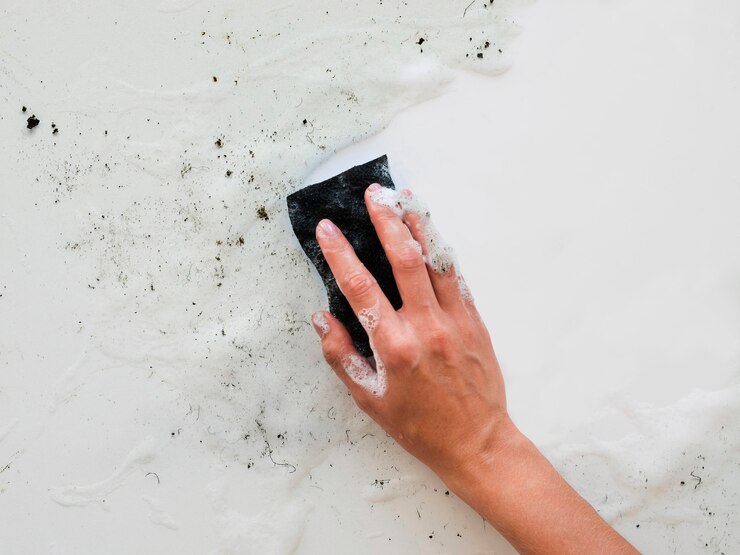
Mold thrives in damp environments, making bathrooms particularly susceptible. To mitigate mold growth, ensure your bathroom is well-ventilated. Utilize an exhaust fan during and after showers to expel moisture-laden air. If your bathroom lacks an exhaust fan, consider installing one or using a dehumidifier. Additionally, after bathing, wipe down shower walls and floors to remove excess moisture. Regularly inspect areas prone to dampness, such as under sinks and around the bathtub, and address any signs of mold promptly.
3. Grout and Caulking Inspection

Grout and caulking play vital roles in sealing joints and preventing water seepage. Over time, they can deteriorate, leading to potential water damage. Regularly inspect these areas for cracks, discoloration, or mold. To repair:
- Remove the old caulk using a utility knife.
- Clean the area thoroughly to eliminate mildew and debris.
- Apply a mildew-resistant caulk evenly along the seam.
- Smooth the caulk with a damp finger or a caulking tool for a neat finish.
This process ensures a watertight seal, preventing water intrusion and potential structural damage.
4. Plumbing Fixture Maintenance

Leaky faucets and clogged drains can lead to water waste and potential damage. Regularly check faucets, showerheads, and pipes for leaks. Address drips promptly by replacing worn-out washers or O-rings. To maintain showerhead performance, remove mineral buildup by soaking the showerhead in a vinegar solution overnight, then scrubbing away any remaining deposits. For clogged drains, use a drain snake or a mixture of baking soda and vinegar followed by hot water to clear minor blockages. Avoid using harsh chemical drain cleaners, as they can damage pipes over time.
5. Tile Deep Cleaning

Tiles can accumulate grime and soap scum, leading to dull surfaces and potential mold growth. For a thorough clean:
- Create a paste using baking soda and water.
- Apply the paste to the tiles and grout lines.
- Scrub with a brush, focusing on stained or discolored areas.
- Rinse thoroughly with clean water.
Regular deep cleaning not only enhances the appearance of your tiles but also prolongs their lifespan by preventing deterioration.
6. Odor Control
Maintaining a fresh-smelling bathroom enhances the overall experience. To naturally eliminate odors:
- Place a bowl of baking soda in a discreet corner to absorb unpleasant smells.
- Use a diffuser with essential oils like lavender or eucalyptus for a pleasant aroma.
- Ensure proper ventilation to prevent musty odors caused by trapped moisture.
Regular cleaning of drains and trash bins also helps in maintaining a fresh environment.
7. Water Damage Inspection
Early detection of water damage can prevent extensive and costly repairs. Regularly inspect your bathroom for signs such as:
- Peeling paint or wallpaper.
- Warped or soft spots on walls or floors.
- Persistent musty odors.
If you notice any of these signs, investigate promptly to identify the source of moisture and address it to prevent further damage.
8. Upgrade to Water-Efficient Fixtures
Modern water-efficient fixtures not only conserve water but also reduce utility bills. Consider installing:
- Low-Flow Showerheads: These use less water without compromising pressure.
- Dual-Flush Toilets: Offer separate flush options for liquid and solid waste, optimizing water usage.
- Aerated Faucets: Mix air with water to maintain pressure while using less water.
The Environmental Protection Agency’s Water Sense program labels products that meet water efficiency and performance criteria, making it easier to choose efficient fixtures.
9. Organization and Decluttering
A well-organized bathroom is easier to clean and more functional. Implement storage solutions to keep countertops clear:
- Over-the-Toilet Shelves: Utilize vertical space for storing toiletries and towels.
- Drawer Dividers: Keep small items organized and easily accessible.
- Shower Caddies: Organize bath products to prevent clutter in the shower area.
Regularly assess your bathroom items and remove products that are expired or no longer in use to maintain a tidy space.
10. Schedule Professional Inspections
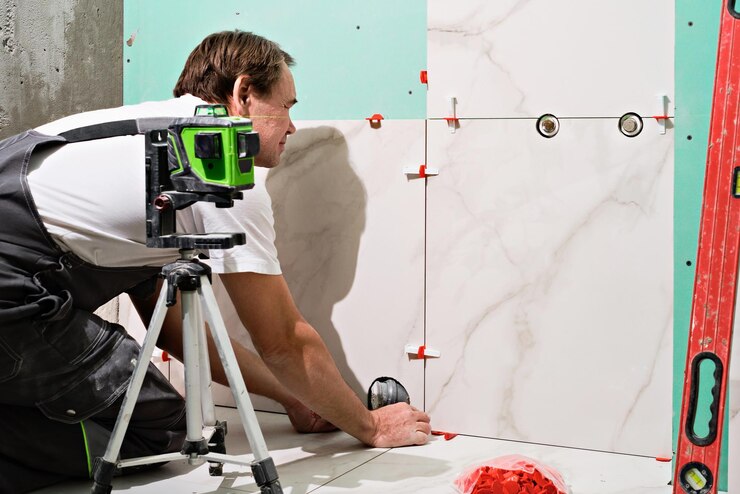
While regular maintenance can prevent many issues, it’s advisable to have a professional inspection annually.
A professional contractor can assess potential plumbing issues, inspect for hidden leaks, and ensure all fixtures are functioning efficiently. Some key benefits of professional inspections include:
- Early Leak Detection: Professionals use advanced tools such as thermal imaging and moisture meters to identify leaks before they cause structural damage.
- Fixture Longevity: Regular inspections help extend the lifespan of sinks, toilets, and showers by ensuring they are in optimal condition.
- Compliance with Building Codes: Professionals can ensure your bathroom meets local plumbing and safety regulations, preventing costly code violations.
Conclusion
Regular bathroom maintenance is a proactive approach that saves money, preserves the integrity of your home, and enhances daily comfort. By following these essential tips cleaning regularly, preventing mold, maintaining fixtures, and scheduling professional checkups you can keep your bathroom fresh, hygienic, and in top condition.
Need Expert Help?
If you’re dealing with persistent plumbing issues, mold concerns, or bathroom fixture upgrades, our team of experienced professionals is here to help. Contact us today for expert bathroom maintenance and remodeling solutions!
Top Bathroom Remodeling Trends 2025: Modern Upgrades & Innovations
Bathrooms are no longer just functional spaces they’re personal sanctuaries that reflect modern lifestyles and design preferences. Staying updated with the latest bathroom remodeling trends can help you create a space that’s not only stylish but also functional and future-proof. Whether you’re a homeowner planning a renovation, a contractor seeking inspiration, or a design enthusiast, 2025 brings exciting innovations that blend luxury, sustainability, and cutting-edge technology.
In this article, we’ll explore the top 7 bathroom remodeling trends for 2025, offering actionable insights and expert tips to help you transform your bathroom into a modern retreat. From minimalist designs to smart technology and eco-friendly upgrades, these trends are shaping the future of bathroom renovations.
Top 7 Bathroom Remodeling Trends for 2025
1. Minimalist Bathroom Design
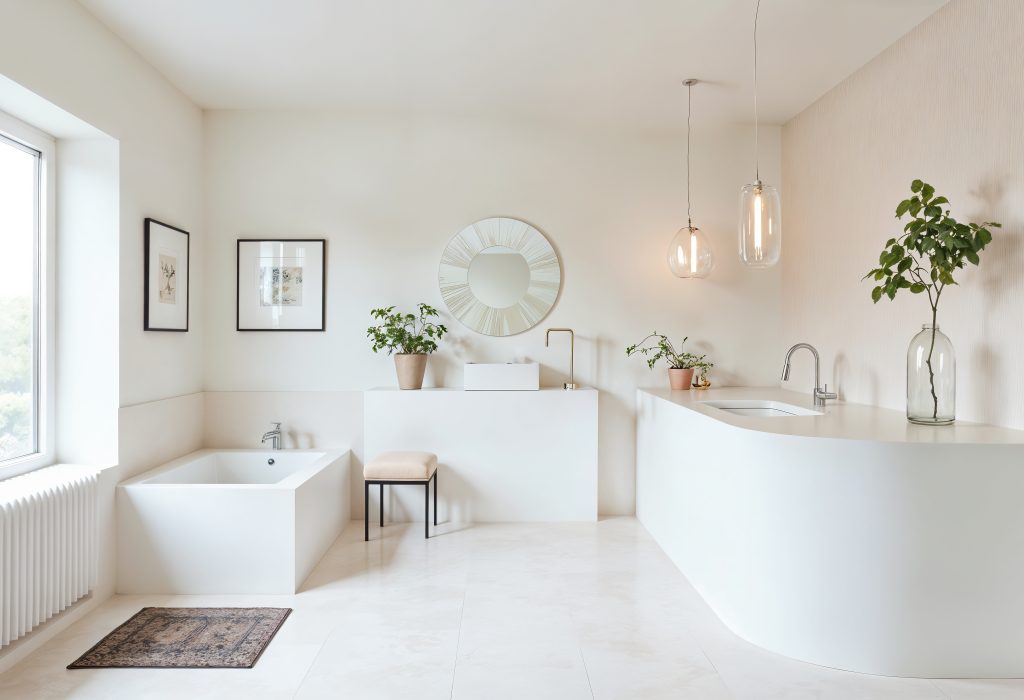
Minimalism continues to dominate bathroom design in 2025, focusing on clean lines, neutral tones, and clutter-free spaces. This design approach emphasizes simplicity and functionality, making it ideal for small bathrooms or anyone seeking a serene atmosphere. Floating vanities, hidden storage, and sleek fixtures are common in minimalist bathrooms, allowing you to create a seamless, modern look. For an extra minimalist effect, consider opting for wall-mounted fixtures to maintain an open, airy feel.
2. Smart Bathroom Technology
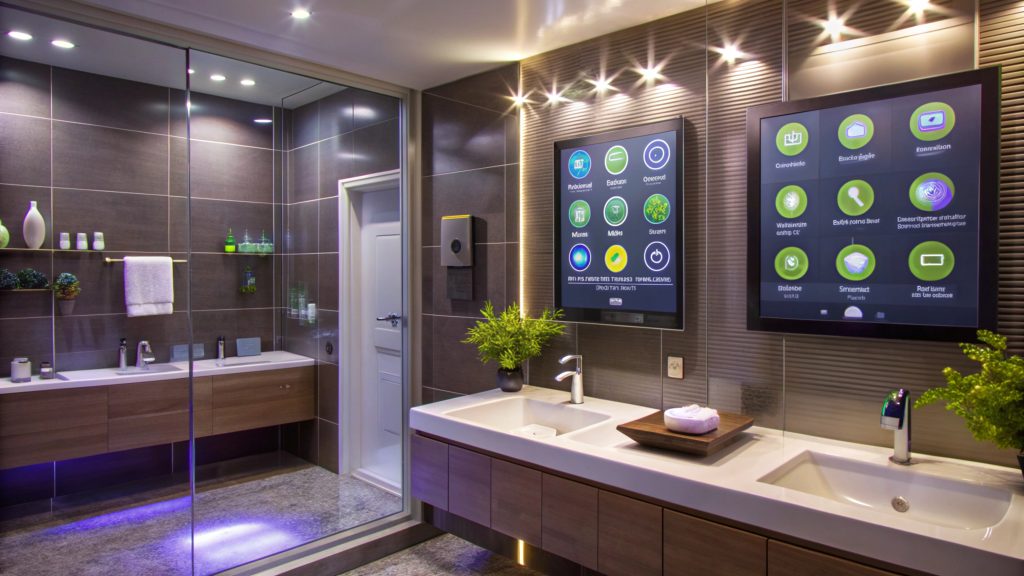
Smart technology is revolutionizing bathrooms by adding convenience, energy efficiency, and a touch of luxury. From voice-activated mirrors and touchless faucets to smart showers, these innovations are becoming essential in modern bathrooms. For example, smart showers with personalized temperature settings are quickly gaining popularity, providing a tailored and luxurious shower experience. The added benefit of these smart features is their ability to reduce water and energy consumption, promoting a more sustainable lifestyle.
3. Sustainable and Eco-Friendly Upgrades
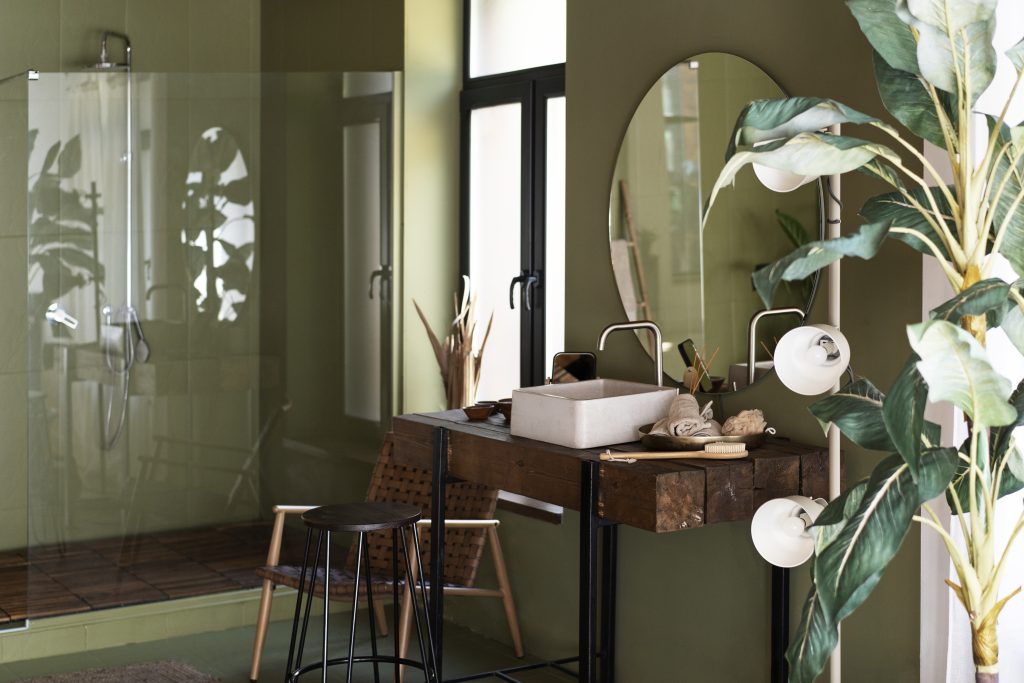
Sustainability continues to be a major focus in 2025, as homeowners opt for water-saving fixtures, energy-efficient lighting, and eco-friendly materials. Examples of this trend include recycled tiles, sustainable countertops, and low-flow toilets. According to studies, eco-friendly bathrooms can reduce water usage by up to 30%. To make your bathroom more sustainable, look for products with Water Sense or Energy Star certifications, ensuring that your upgrades are both environmentally friendly and efficient.
4. Spa-Like Retreats at Home
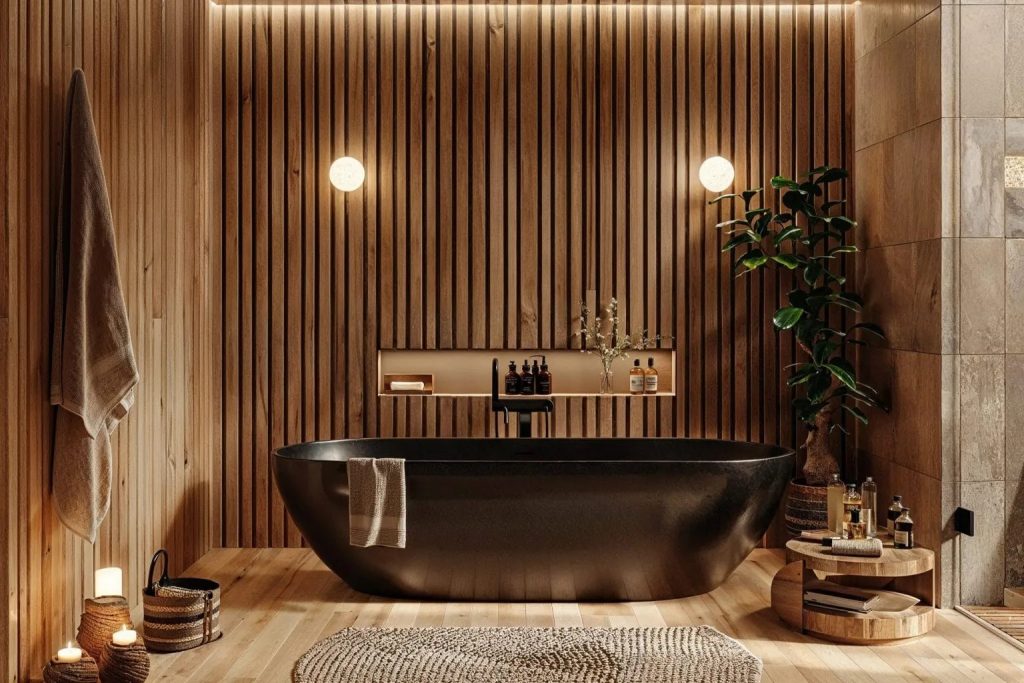
Transforming your bathroom into a luxurious spa-like retreat is a growing trend. With features like freestanding tubs, rainfall showers, and heated floors, this design direction emphasizes relaxation and self-care, creating a sanctuary where you can unwind after a long day. Incorporating natural materials such as stone and wood into the design can enhance the spa-like ambiance, offering a peaceful and soothing atmosphere.
5. Bold Colors and Unique Textures
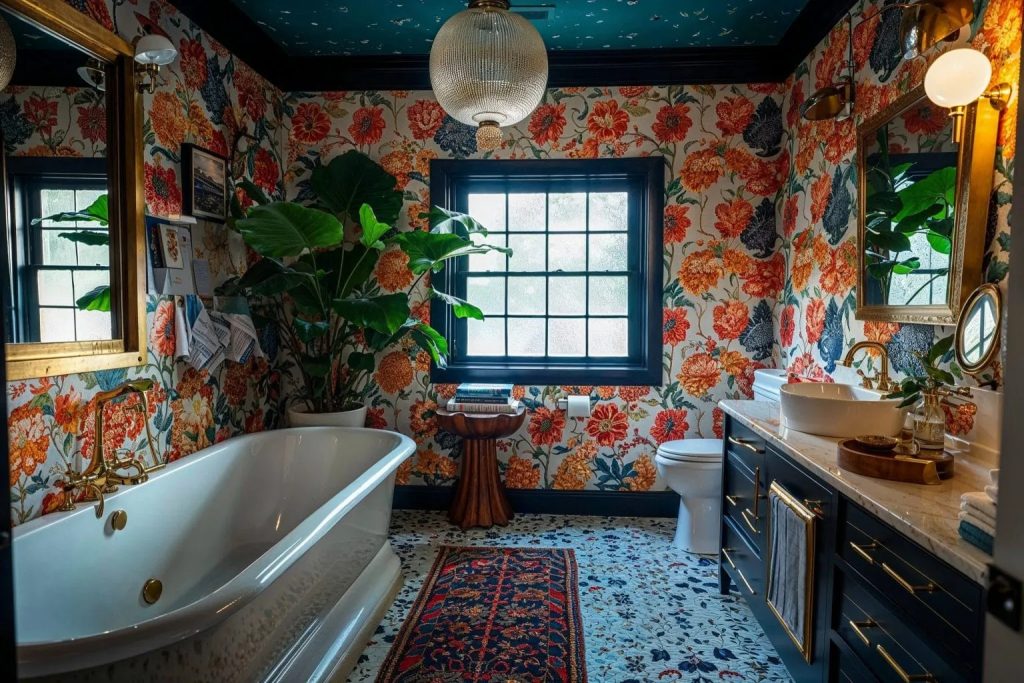
Move over neutral palettes 2025 is all about bold colors and unique textures. Deep blues, emerald greens, and matte black fixtures are making waves in bathroom design. These bold tones are often paired with statement tiles and mixed materials to create dynamic and visually striking spaces. For instance, matte black fixtures combined with emerald green tiles can create a bold, modern statement. However, it’s important to use bold colors sparingly to avoid overwhelming the space.
6. Open and Airy Layouts
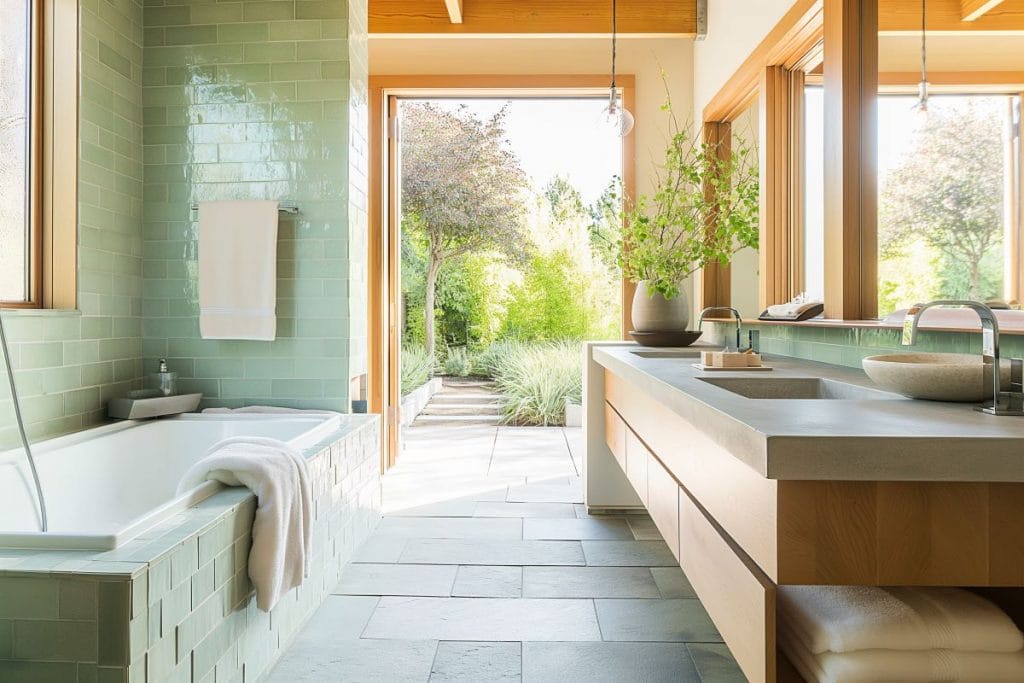
Open-concept bathrooms are gaining popularity, with large windows, skylights, and glass partitions playing a significant role in creating an airy and spacious environment. This layout maximizes natural light, giving even smaller bathrooms a sense of openness. Frosted glass partitions allow you to maintain privacy while still enjoying the light and airiness of an open-concept bathroom.
7. Customizable and Modular Features
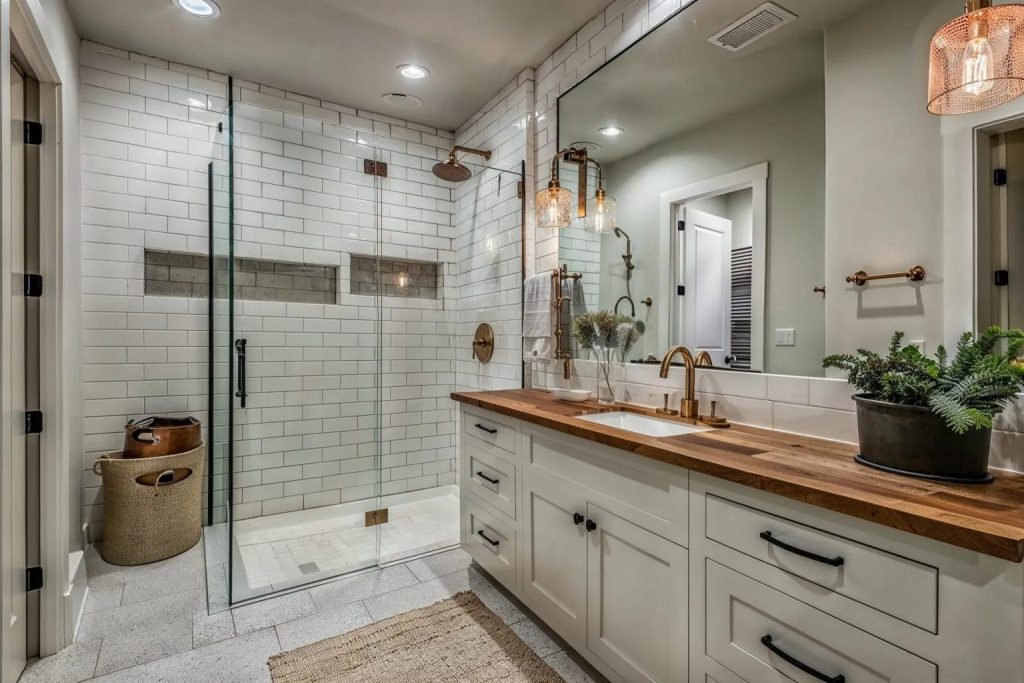
Customization is a key theme in 2025, with modular vanities, adaptable storage solutions, and flexible layouts catering to diverse needs. This trend is perfect for homeowners who want a personalized, functional space. Modular vanities with adjustable shelving, for example, are ideal for small bathrooms, allowing you to maximize storage without compromising on style. This flexibility helps ensure that your bathroom works for your specific needs and lifestyle.
Practical Tips for Incorporating 2025 Bathroom Trends
If you’re considering implementing these trends in your own bathroom, here are a few practical tips to get started. Start small by focusing on affordable upgrades such as replacing fixtures or adding smart technology to increase functionality. Remember to balance aesthetics with functionality by choosing trends that suit both your lifestyle and budget. For more complex upgrades, consulting a professional contractor ensures quality work and safety during the renovation process.
Conclusion
The bathroom remodeling trends of 2025 offer something for everyone, from minimalist designs and smart technology to eco-friendly upgrades. By incorporating these trends, you can create a space that’s not only functional and stylish but also boosts your home’s value and enhances your daily quality of life.
Ready to transform your bathroom? Contact a professional contractor today to bring your vision to life!
- Published in Blog
How to Renovate Your Home for Better Air Quality
Cleaning the air in your home is critical to your health and overall quality of life. If you’re planning a home improvement project, make sure to renovate your home for air quality by incorporating air purifiers and other indoor air improvement solutions. During and after renovations, using a high-quality air purifier can drastically reduce contaminants like dust, allergens, and VOCs.
In this guide, you’ll discover why indoor air quality should be a renovation priority and how to use the right techniques and tools like home air purifiers to ensure your family breathes clean, healthy air during and after your remodeling project.
Benefits of Renovating for Better Air Quality
1. Health Benefits
Clear air help one avoid respiratory diseases, allergies and ongoing sicknesses. Living in a healthy environment means making sure that when you are designing your home that you take air quality into consideration when renovating.
2. Improved Comfort
The absence of stink, dust and allergens in the house is always a plus especially to the house occupants. Clean air also helps sleep and productivity to improve significantly, which are conditions that make any improvement in students’ health crucial.
3. Energy Efficiency
Some facets of air quality like proper ventilation and air filtration can boost your home efficiency and hence more saving.
Renovation Tips to Enhance Air Quality with a Home Air Purifier
1. Choose Low-VOC and Non-Toxic Materials
Many paints, adhesives, and flooring materials release VOCs, which can linger in your home and harm your air quality. Opt for low-VOC or VOC-free options during your home renovation.
2. Upgrade to the Best Air Purifiers
While renovating, invest in the best home air purifier to trap airborne particles like dust, pollen, and mold. These devices are especially useful during and after construction work.
3. Install an Advanced Air Filtration System
Consider installing a whole-home air filtration system for home. These systems work alongside your HVAC system to filter out impurities across all rooms, maintaining consistent air quality throughout your living space.
4. Enhance Ventilation
Improper ventilation can trap pollutants indoors. Work with a home remodel contractor to ensure your renovation includes features like energy-efficient windows and exhaust fans that improve air circulation.
How to Use a Home Air Purifier During Renovations
1. Select the Right Room Air Purifier
When choosing a home air purifier, consider the room size and the type of pollutants you’re targeting. When redesigning your home try and select paint that is low in VOC or even VOC-free.
2. Position Strategically
During the home remodeling process, purchase a good home air purifier to capture dust, pollen, and mold among other airborne particles. These devices are especially useful in and after constructions projects.
3. Regular Maintenance
In addition to the above suggestions, propose that the home shall install a whole home air filtration system. These systems complement your HVAC system to remove impurities in air throughout each room and give a standard quality of air indoors.
Best Air Purifiers for Renovated Homes
Here are some of the best air purifiers that work exceptionally well during and after home renovations:
- HEPA Air Purifiers: They come with a very important quality of trapping 99.97% of airborne particles such as dust and other allergens.
- Activated Carbon Filters: Really great in neutralizing odor and VOC contained in newly installed materials.
- UV-C Purifiers: These assists to neutralize bacteria and virus making it a safer practice in case there are outbreaks in the community.
Some important things to look particularly at while choosing the right home air purifiers are the size of the space to be covered, the level of noise produced by the purifier and the regularity of cleaning of the purifier.
Key Features to Look for in a Home Air Purifier
1. Filtration System – Broad air filtering should be implemented by multi-stage furnaces using HEPA and activated carbon filters.
2. Energy Efficiency – Choose models certified by the ENERGY STAR logo to decrease the electricity consumption and maintain the purity of the air in your house.
3. Smart Controls – Top of the range air purifiers have interactive features like mobile application control, ability to monitor atmospheric elements within the room, and capacity to adjust itself depending on the prevailing atmospheric conditions within the room to be cleaned.
Long-Term Renovation Strategies for Clean Air
1. Incorporate Greenery
Meaning, plants are portable air cleaners. Buy new furniture and arrangements to make it a safe place and bring works of indoor plants that purify toxins as a part of the remodel.
2. Use Smart Ventilation Systems
Modern ventilation systems can control the flow of fresh air into any room, remove damp air and lower its level. These systems should be used in conjunction with an air filtration system for home to get the best results out of it.
3. Seal Gaps and Leaks
They can develop gaps in the walls and floor through which outdoor contaminants may infiltrate a house. Caulking windows, doors and walls when you are retrofitting your building can improve the effectiveness of your air purifiers and filtration systems.
4. Partnering with a Home Remodel Contractor
A skilled home remodel contractor can help implement air quality improvements during your renovation. Their expertise ensures that upgrades like ventilation systems, insulation, and air filtration are installed properly and efficiently.
Post-Renovation Maintenance Tips for Air Quality
1. Continue Using the Best Home Air Purifiers – Also, when doing a room makeover or redecorating, continue the use of air cleaners because clean air is still important.
2. Regular Cleaning – Construction dust and debris poses a great challenge when carrying out renovations. Lead cleaning services to clean the floors walls and furniture to ensure that no particle is left behind.
3. Inspect Ventilation Systems – It is recommended to have your systems of ventilation and heating/cooling periodically checked and cleaned.
Why Air Quality Should Be a Priority
Renovating with this objective is not simply an aesthetic improvement of the house, but a detailed improvement of the house in terms of health. In fact, whether it is changing ventilation systems to the best large room air purifiers, or whether it is opting for low VOCs materials, such changes might go a long way in improving the living environment.
Hence it will help you understand how to make your home not only attractive but also more comfortable with clean fresh air as indicated above tips and strategies.
- Published in Blog, Remodeling
5 Basement Remodeling Ideas for 2025
People do not seem to use basements as poorly illuminated, unfunctional areas of their houses any more. Basement remodeling in 2025 is another trend predominant which converts these areas to functional, fashionable and appreciable add-on to your home. It can turn into entertainment facilities, quiet places for natural living, all you can imagine. Regardless of whether you need a large amount of space after the redesign, or you are simply looking for minor changes, the reconstruction of the basement is complex, but very useful when it comes to increasing the value of your property with the appropriate requirements for the needs of your family. It is possible to have a perfect basement remodel by implementing new styles, and by hiring qualified contractors. Now let’s look into five most popular basement renovation ideas for 2025 to help you get inspired for your basement project as well as learn how a right basement contractor would help you in creating your dream basement.
Create a Luxurious Home Theater
Think about turning your basement into a dramatic home theater. That is why one of the most popular basement remodel ideas in 2025 is a focused movie-watching area.
Key Features for Your Basement Home Theater:
- Acoustic Panels: These improve sound quality while at the same time reducing sound that is transferred to other sections of the home.
- Recliner Seating: Comfortable seating options create a cozy theater-like experience.
- Smart Lighting: Movie nights are made for with dimmer switches and smart lights.
- Large Screen & Surround Sound: Invest in high-quality audiovisual equipment for an immersive experience.
When hiring a basement general contractor, he will be able to install soundproofing and electrical systems – two requirements for a basement.
Design a Modern Home Office
With the advancement in technologies and due to the outbreak of COVID-19 pandemics remote work is now a trend, now transforming your basement into a fashionable and effective, home office is the right decision. When designing basement interior design for home offices it is important to consider comfort, functionality, and also aesthetics.
Tips for a Productive Basement Office:
- Ergonomic Furniture: Choose a desk and chair that support long hours of work.
- Ample Lighting: Switch on artificial light, make use of LED lights or natural light to well illuminate the space.
- Storage Solutions: Use bookshelves or cabinets to store your things in order to have clean and clutter free working area.
- Decorative Touches: It is still possible to add some elements as photographs or painting, green plants, a brightly colored wall, etc. Hiring a contractor for basement remodel will help in finding the best design that fits the functionality of the office as well as the aesthetic value.
Consulting a contractor for basement remodel ensures that your office space is both functional and visually appealing.
Build a Wellness Retreat
Bring the health vibe in your bedroom into your basement and aroma therapeutic oasis for your body. It is indeed among the most striking basement renovations for the homeowner who wants a quiet environment.
Ideas for a Wellness-Focused Basement:
- Home Gym: Provide your home with exercise equipment, a yoga mat, and dumbbells.
- Spa Zone: Try having selected home additions such as a sauna or a hot tub that provides the best relaxation.
- Calming Design: This area should be painted in neutral colours, softly lit and decorated in natural fabrics.
- Sound System: Integrate speakers to play some kind of soothing music or even walking.
Partnering with a basement remodel contractor can ensure proper ventilation and moisture control, critical for gym or spa setups.
Create a Multi-Functional Living Space
If you have families that require additional accommodation, then, there is no better way of making productive use of the basement than getting it converted into a living space. It is quite a kind that allows fulfilling various tasks, including a guest room, a children’s room, or studio.
Features to Include in Multi-Functional Spaces:
- Open Layout: Don’t over-clutter the interior and divide it into the chill zone, the dining area and the play area.
- Convertible Furniture: We recommend folding sofas, or Murphy beds that can be easily converted.
- Storage Solutions: Overhead storage trims the space above a bed, desk, or couch into built-in shelves or cabinets.
- Basement Design Ideas: For instance, you may decide to change your kitchen by adding elements such as exposed brick walls or modern lighting, or more elegantly designed floors.
It is important that an experienced basement contractor guide you through this thrilling change to accommodate your family.
Install a High-End Wine Cellar
Wine lovers regard a custom wine cellar as one of the best enhancements one can make in a basement. This trend is slowly developing the popularity amongst the homeowners wanting to display their collections and at the same time, making the room refined.
Essentials for a Wine Cellar:
- Climate Control: Arrange for proper cooling equipment that will help maintain the correct temperature, humidity, etc.
- Custom Racks: Here, you should target shelving for your collection and for the basement decor that is available.
- Tasting Area: Include an area for people to sit with a table in order to drink wine with friends.
- Elegant Lighting: Accent lighting should be used to illuminate your collection as well as to serve purposes of creating ambiance.
A proficient basement general contractor can deal with some of the intricate issues common to wine cellar construction including insulation and heating/cooling system.
Planning Your Basement Renovation
Why Work with a Contractor for Basement Remodel?
It is important to hire a basement remodel contractor because your remodeling process will be well done and in the right manner. They come with knowledge in such service delivery facets as waterproofing, structural alterations, and construction.
Steps to Begin Your Renovation:
- Assess Your Needs: Categorize the functional use of the space as to how you want it occupied.
- Set a Budget: Find out how much money you can afford to spend, when planning for the undertaking.
- Find Inspiration: Explore basement renovation ideas and trends.
- Hire a Professional: Look for a reputable basement contractor to guide the process.
Best Practices for Basement Renovations
1. Focus on Waterproofing
Every renovation needs a dry basement and here it is!” In addition, it is important that the floors should be well sealed, to avoid cases of water damages such as soaking in the presence of water, or lack of proper drainage and dehumidification.
2. Prioritize Lighting
Basement habitats may be rather damp and temperature fluctuation may be relatively high. Popular choices include vinyl flooring for the floors along with treated lumber as well as mold resistant dry walling.
3. Choose Durable Materials
Fixed shelf systems optimize storage and do not clutter the area with furniture.
4. Incorporate Storage
Built-in storage solutions maximize space and keep the area clutter-free.
Why Basement Renovations Add Value
Basement remodeling provides added value to one’s home by improving its usability and raising return on investment. Due to the motivations of customers, vague finish in the basements is an important aspect as many people are inclined towards having extra living areas. From entertainment zones to private retreats, basement renovations can bring the best if done properly.
Conclusion
If you are picturing a comfortable home cinema, efficient working space, or a sophisticated wine storage, these options for basement remodel in 2025 will give the ideas to everyone. Consequently, teaming with a professional and skilled basement remodel contractor guarantees the dream turns into reality and fabulous creation. Begin your project right now and make your basement into the space you’ll enjoy for many years. If you want to start, get a professional basement contractor to help and lead you throughout the renovation process!
- Published in Blog, Remodeling
Top Basement Remodeling Tips and Design Ideas for 2025
Basements are no longer dark, neglected spaces. With the right approach, they can transform into stunning, functional areas. If you’re planning a basement remodeling in 2025, you’ll want to consider the latest trends and practical design ideas. Thoughtful basement renovations can add significant value to your home while enhancing your living space. Whether you’re working with professionals or going the DIY route, this guide provides the essential tips, tricks, and inspiration for modern basement remodeling. From selecting the right finishes to choosing trusted basement contractors, we’ve got everything you need to turn your basement into a showstopper.
Key Considerations Before Starting Basement Remodeling
1. Plan Your Layout
Every successful basement renovation begins with a solid plan. Think about how you want to use the space. Do you need a cozy family room, a home gym, or a guest suite? The layout should reflect your needs while maximizing the available square footage.
2. Address Structural Issues
Check for moisture, leaks, or cracks before diving into a remodel. A dry, sturdy foundation is essential for a long-lasting basement. Engage basement remodeling contractors to assess your space and suggest solutions for any underlying problems.
3. Budget Wisely
Setting a realistic budget is critical. Include costs for materials, labor, and unexpected expenses. Collaborating with experienced basement finishing contractors can help you estimate and stick to your budget.
Basement Renovation Ideas for 2025
Transform your basement with these trending basement renovation ideas:
1. Create a Multi-Functional Space
Modern basements are designed to serve multiple purposes. Combine a home office with a media room or add a workout area next to a playroom. Flexible furniture and smart layouts make this possible.
2. Focus on Natural Light
Brighten your basement with larger windows or well-placed light wells. Mirrors and light-colored walls can amplify the effect, making your space feel more open and inviting.
3. Add a Wet Bar or Kitchenette
A wet bar or kitchenette is perfect for entertaining. Include a mini-fridge, sink, and stylish cabinetry for a functional yet chic addition to your basement remodeling project.
4. Home Theater Setup
With the rise of streaming, home theaters are a popular choice for basement renovations. Install comfortable seating, surround sound, and a large screen to recreate a cinematic experience.
Basement Design Ideas: Trends for 2025
1. Industrial Chic
Industrial-style basement design ideas are making waves. Exposed brick walls, metal accents, and polished concrete floors create a sleek and modern aesthetic.
2. Cozy Retreats
For those who prefer warmth, consider soft lighting, plush seating, and wooden finishes. A cozy basement can serve as a family room or a reading nook.
3. Minimalist Touches
Simplicity is key in many 2025 designs. Neutral colors, clean lines, and uncluttered layouts create a sophisticated vibe.
4. Smart Home Integration
Incorporate smart home technology. Automated lighting, temperature control, and sound systems elevate your basement remodeling project.
Choosing The Best Basement Remodeling Contractors
Collaborating with skilled professionals ensures high-quality results. Here are some tips for choosing the right basement contractors:
1. Research and Reviews
Look for basement remodeling contractors with excellent reviews and portfolios. Recommendations from friends or family can also guide you to reliable professionals.
2. Clear Communication
Discuss your vision, budget, and timeline with your chosen basement renovation contractors. Clear communication avoids misunderstandings and ensures your expectations are met.
3. Licensing and Insurance
Ensure the contractors are licensed and insured. This protects you from potential liabilities and guarantees adherence to building codes.
Transform Your Basement with Expert Finishing Contractors
Experienced basement finishing contractors can make all the difference. They specialize in converting unfinished basements into livable areas. Here are some tips for working with them:
- Discuss Finishes: Choose flooring, wall treatments, and ceilings that suit your style and budget.
- Optimize Storage: Built-in shelving or under-stairs storage can add functionality without taking up extra space.
- Energy Efficiency: Ask about insulation and energy-saving options to make your basement more comfortable and cost-effective.
Choosing Basement Renovation Contractors: What to Look For
1. Expertise
Not all contractors are equal. Look for those with specific experience in basement renovations to ensure a seamless process.
2. Portfolio
Request to see their previous projects. This gives you an idea of their style and craftsmanship.
3. Transparency
Reputable contractors provide detailed estimates and timelines. They should be upfront about potential challenges and solutions.
Basement Design Ideas to Inspire Your 2025 Remodel
1. Open Concept Layouts
An open-concept basement feels spacious and airy. Combine areas like a lounge, bar, and game room for a cohesive design.
2. Statement Lighting
Modern lighting fixtures can transform your basement. Pendant lights, recessed lighting, and LED strips create a stylish and functional ambiance.
3. Bold Colors
While neutrals dominate, bold pops of color in furniture or accent walls can add personality to your space.
4. Unique Flooring Options
From vinyl planks to heated tile floors, innovative flooring materials add both comfort and durability.
Conclusion
Basement remodeling in 2025 offers endless possibilities to transform an underutilized space into something extraordinary. Whether you’re crafting a cozy retreat, a state-of-the-art home theater, or a multi-functional living area, thoughtful design and planning are key. Partner with experienced basement renovation contractors and stay updated with the latest trends to create a basement that enhances your home’s value and functionality. With the right approach, your basement can become the most beloved part of your house.
- Published in Blog
Kitchen Remodeling Mistakes to Avoid: Expert Advice
Renovating a kitchen is always an interesting and challenging process at the same time. It is a capital intensive exercise that if well done can make a big difference in the value and functionality of the home. However, there are some time-tested mistakes that people faced with the work at home idea should be aware of. Below are some tips that a professional in this field can offer so that you can avoid these mistakes when conducting the kitchen remodeling.
Neglecting the Budget
One of the most frequently made errors is, in fact, the absence of a reasonable budget. It is tempting to choose the best brands in kitchen equipment and fancy looks. However, it is important to set one or more limits. Always provide for an emergency fund. Emergencies are bound to happen, especially during remodeling projects.
Ignoring the Workflow
The kitchen is not a living room; it is a workplace. The planning should support this concept. The traditional “triangle rule” is a good starting point. This rule suggests the distance between the sink, stove, and refrigerator should be optimal. Failing to follow this rule might result in a good-looking kitchen that does not serve its intended purposes well.
Overlooking Storage Needs
One of the biggest remorse that homeowners encounter after undertaking a kitchen renovation is lack of sufficient storage space . Make sure that you leave room for many cabinets, draw and pantry. Some ideas of creative arrangements are pull out shelf, lazy Susan, and deep drawer used for storing pots and pans.
Choosing Aesthetics Over Functionality
Yes, you want your kitchen to look good, pretty, whatever, but looks should never take precedence over practicality. For instance, while open shelving is great fashions, it means that you have to work harder at ensuring that it remains neat. Likewise, glossy coatings are certain to give fingerprints and smudges compared to matte ones.
Poor Lighting
This is an essential area that is commonly neglected in most kitchen design when in fact it is important in functionality and also creates the mood. A kitchen should have functional lights which are the task lighting (under-cabinet), the ambient lights (ceiling), and accent lights (pendant or spotlight).
Skimping on Quality
Substandard materials and poor workmanship also have future implications if type of construction is adopted. Use good quality products and contract professional services. This may cost more initially but it would eventually be cheaper as well as would not give a lot of trouble.
Not Considering the Future
You may have a favorite trend that is hot in the design world right now, but your kitchen needs to be timeless. Chose a style that with not be out dated after years from now. Thirdly, you should think about how your need can change in the future. For instance, if your intention is to live in your house when you grow old, then it is time to consider some universal designs.
Forgetting Ventilation
Also for extraction there should be excellent ventilation to help remove cooking smells, smoke, and grease from the kitchen. Ensure you buy a range hood that can address your cooking needs and aims to remove the air outside.
DIY Overconfidence
As we know, sometimes it is all right to do everything on your own, but when it comes to the remodeling of the kitchen it is better to address to the professionals. Many electrical works, plumbing and complex installation jobs have to be done professionally to avoid complications, and ensure compliance to standard safety measures and building regulations.
Lack of Planning
Finally, the biggest mistake is failing to plan adequately. Spend time conceptualizing all aspects of your remodel including location, type of construction, materials, time line and cost. If you want to avoid the costs of changes and schedule extension, you should develop a good plan.
Conclusion
There are many mistakes that homeowners can make during a kitchen remodel, but with some knowledge these mistakes do not have to happen. Ensure that the budget, the flow of works, storage, and print quality takes a priority and do not be shy to ask for help from experts. Happy remodeling!
- Published in Blog, Kitchen, Remodeling
How to Choose the Right Contractor for Your Home Interior Renovation
Choosing the right contractor for your home interior renovation is a crucial step that can make or break your project. A good contractor will ensure that your renovation is completed on time, within budget, and to your satisfaction. Here’s a comprehensive guide to help you choose the right contractor for your home interior renovation.
Define Your Project Scope and Budget
Before you start looking for a contractor, it’s essential to have a clear understanding of what you want to achieve with your renovation. Make a list of all the changes you want to make and prioritize them. This will help you communicate your vision clearly to potential contractors. Additionally, establish a budget for your project. Knowing how much you’re willing to spend will help you narrow down your options and avoid overspending.
Do Your Research
Start by asking friends, family, and neighbors for recommendations. Personal referrals are often the best way to find reliable contractors. You can also search online for contractors in your area and read reviews on websites like Yelp, Google, and Angie’s List. Look for contractors with consistently positive reviews and a good reputation in the community.
Check Credentials and Experience
Once you have a list of potential contractors, check their credentials. Ensure they are licensed, insured, and bonded. Licensing requirements vary by state, so check with your local licensing authority to verify that the contractor’s license is current. Insurance is crucial because it protects you from liability in case of accidents or damage during the renovation. Bonding provides an additional layer of protection, ensuring that the contractor will complete the job as agreed.
Experience is another critical factor. Look for contractors who have been in business for several years and have experience with projects similar to yours. An experienced contractor is more likely to handle unexpected issues effectively and deliver high-quality work.
Interview Multiple Contractors
Don’t settle for the first contractor you find. Interview at least three contractors to compare their qualifications, experience, and pricing. During the interview, ask about their previous projects, how they handle challenges, and their approach to communication. A good contractor should be able to provide references from past clients. Contact these references to ask about their experience working with the contractor, the quality of the work, and whether the project was completed on time and within budget.
Get Detailed Estimates
Ask each contractor for a detailed written estimate that includes the cost of materials, labor, and any other expenses. The estimate should also outline the scope of work, the timeline for completion, and the payment schedule. Be wary of estimates that are significantly lower than others, as this could be a red flag for subpar materials or workmanship. A detailed estimate will help you compare contractors more accurately and avoid misunderstandings later on.
Check for Red Flags
Be on the lookout for red flags that could indicate a problematic contractor. These include:
- Lack of proper licensing or insurance
- Unwillingness to provide references
- High-pressure sales tactics
- Unusually low bids
- Poor communication or unprofessional behavior
Trust your instincts. If something feels off, it’s better to move on and find another contractor.
Review the Contract Carefully
Once you’ve chosen a contractor, review the contract carefully before signing. The contract should include:
- A detailed description of the work to be done
- The total cost and payment schedule
- The timeline for completion
- Warranties for materials and workmanship
- A clause outlining how changes to the project will be handled
Make sure you understand all the terms and conditions. If there’s anything you’re unsure about, ask for clarification. It’s also a good idea to have a lawyer review the contract to ensure your interests are protected.
Maintain Open Communication
Effective communication is key to a successful renovation. Establish a communication plan with your contractor from the start. Decide how often you’ll have progress meetings and the best way to reach each other. Regular updates will help you stay informed about the project’s progress and address any issues promptly.
Monitor the Work
While it’s important to trust your contractor, it’s also essential to stay involved in the project. Visit the site regularly to monitor the work and ensure it’s being done according to the plan. If you notice any issues, address them with the contractor immediately. Keeping a close eye on the project will help you catch problems early and ensure the renovation stays on track.
Be Prepared for the Unexpected
Even with the best planning, unexpected issues can arise during a renovation. Be prepared for delays, cost overruns, and other surprises. Having a contingency fund can help you handle these unexpected expenses without derailing your project. Stay flexible and work with your contractor to find solutions to any problems that come up.
Conclusion
Choosing the right contractor for your home interior renovation is a critical step that requires careful consideration and due diligence. By defining your project scope and budget, doing thorough research, checking credentials, interviewing multiple contractors, getting detailed estimates, and maintaining open communication, you can find a contractor who will deliver high-quality work and make your renovation a success. Remember, the right contractor will not only bring your vision to life but also make the renovation process smooth and stress-free.
- Published in Blog, Remodeling
How to Prepare Your Home for Window Installation
Replacing your windows is one of the best ways to improve your home’s value, comfort, and energy efficiency. To help your installation go smoothly, it’s important to prepare your home in advance. A well-prepared space keeps your belongings safe and helps the crew work faster. Here’s how to get your house ready for window installation.
Clear the Area Before Window Installation
The first measure of planning before putting windows involves a cleanup of the surroundings of each window, both from the interior and exterior view. This will make the installers have full visibility of the windows and no barriers are going to hinder them. Inside the home, relocate every movable object far from the windows, including curtains, blinds and all noticeable decorations. All items that are susceptible to being easily broken should be relocated for the period of the installation, items like vases, picture frames, paintings etc. If window installation is in a room where there could be little space, then bigger furniture can be shifted to another room in the house all together.
In the neighborhood, prune any plant, bush or tree that might hinder one from accessing the windows of their house. You’ll also want to make sure that there is enough room for the installers to put their tools and equipment adjacent to the windows. This encourages efficiency because the installers do their work in a less congested environment and reduces the overall time taken.
Protect Floors and Furniture During Window Installation
Window replacement can be a dirty business. Aspect For example, during the process of removal of old windows or the fixing of new ones, dust, debris and small pieces of the materials may be produced. In order to avoid such incidences and maintain cleanliness within the house, it is important to cover your floors and furniture. Both drop covers, tarpaulin and sheeting for floor coverage with the provision of proper coverage on the interior of the installation area. This protects your floor from scratches, dents, and falling debris during installation. As for items that cannot be removed from the area, use sheets or tarps to cover them so they don’t get dusty or dirty during cleaning.
If the rooms contain carpets where windows are being installed it is wise to use the painter’s tape to stick the edges of the drop cloths on the floors to avoid them from moving when the windows are being installed.
Keep Pets and Children Safe During Installation
Some precautions have to be taken as the window installation process might be dangerous, particularly when young children and pets are present. It is an unfortunate possibility that the installers will be moving around heavy tools, glass, or construction materials, which can be a danger to the pet’s prying eyes or children.
If possible, take your pets elsewhere in the home, or better still, ask someone to keep them elsewhere during the installation process. Plan an activity to keep children in another room and away from the work zone.
This helps to minimize any dangers that may be posed to either those in your family or the installation crew.
Provide Easy Access to Your Home
The workers who will install new windows will be required to work on both sides of the home – the interior and the exterior. Make sure all entrances and exits are clear before the team arrives.
Open all doors and gates to the areas which require the installation of windows. If you have a garage or shed where installers are likely to store materials or equipment, ensure that the location is also readily accessible. Also, see to it that no car is left on your driveway to facilitate easy access of the installation team who should be able to park and offload their items near the working area.
Easy access ensures the crew conducts their work effectively and in return, enables the completion of the project as required.
Remove Window Treatments
These include, curtains, blinds, and shades and will require them to be taken down before the work commences. These items can slow down the installation and may get damaged if left on the walls.
Pull all window treatments off of the windows and set them aside until the other windows are glazed. If you have curtain rods or blinds which use screws to fix them in place, it will be important to remove them too. It also has the advantage of providing the installers with more working space. When you remove window treatments, you simply want to give the windows a chance not only to be safe from being damaged but also to have more free space for other people who work there.
If you are going to apply the same treatments once the new windows are fitted, make sure that every piece of mounting gear is put together in a box or other storage box with the identification so they can just be screwed back when all the fittings are done.
Inform the Installation Team of Any Special Instructions
He usually has certain areas or aspects in his home that may need the attention of the installation team, which is why he discusses this matter with them. Make sure to let the team know if there is anything you are especially worried about when it comes to your home, or any special worries about installation. For instance, most homes are built with subtle features like wooden trims or custom millwork, and it will be wise to brief the installers on these features so that they exercise a lot of caution while working on the area. If you share this information with the crew, they will not cause any accidental damage, and the installation will be done according to the agreed requirements.
Prepare for Noise and Disruption
Windows’ putting is a construction exercise just like any other and therefore could cause so much noise and also interferences. Expect some form of noise because the old window will be taken and replaced by a new one and other tools such as drill and saw are utilized. He recommends that those who work from home or require a quiet setting seek other accommodations during the installation days. Make your neighbors aware of the project, especially if it will require several windows and will take a week or more. This will keep a good line of communication, and they will feel free to tell us when there is going to be noise and hustle-bustle.
Plan for Proper Ventilation
During installation, your old windows will be taken out, and to give you some form of temporary window, the contractor will just make a gap in your walls. This can cause varying temperatures indoors, warm and cooler times of the year, dust, and or insects from outside getting into the home. Proper ventilation is key, especially during extreme temperatures.
Depending on the current weather, you may need to tweak your chosen room’s HVAC for a short time based on comfort. When possible, avoid opening doors to the other parts of the house to reduce the chances of spreading dust or debris around the house.
Conclusion
As you plan for window installation, you don’t have to worry about how to prepare your home for this service. By taking a few steps clearing space, covering furniture, and securing pets you can avoid delays and protect your home. Proper preparation not only guards the home from possible damage but also ensures the installers complete their task as is required faster without compromising their safety. With the right formulation, your new windows will be installed without ever disturbing you and your family, and your home will be comfortable, energy-efficient, and beautiful.
- Published in Windows

