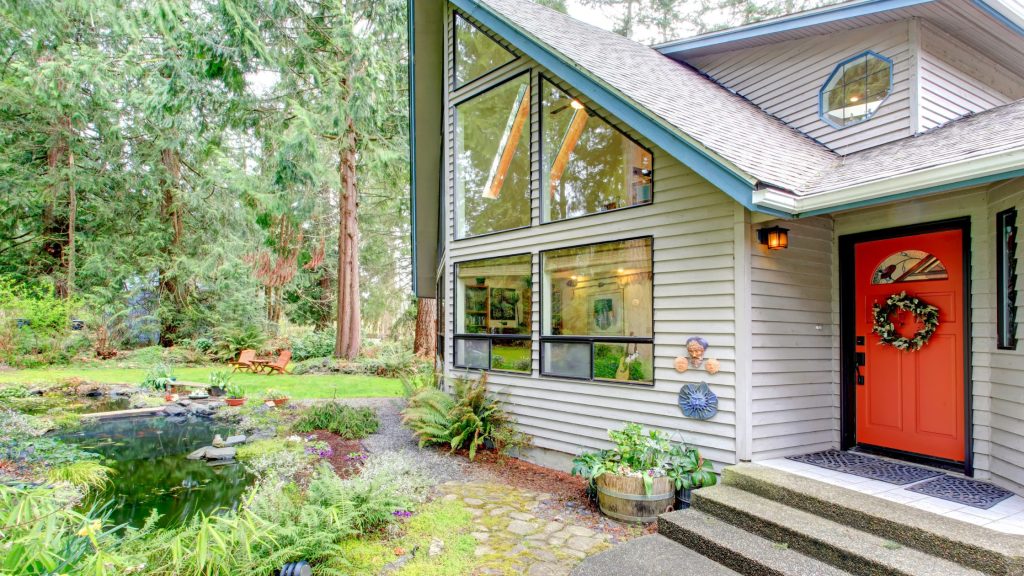
Covered Deck Additions: Blending Outdoor Comfort & Style

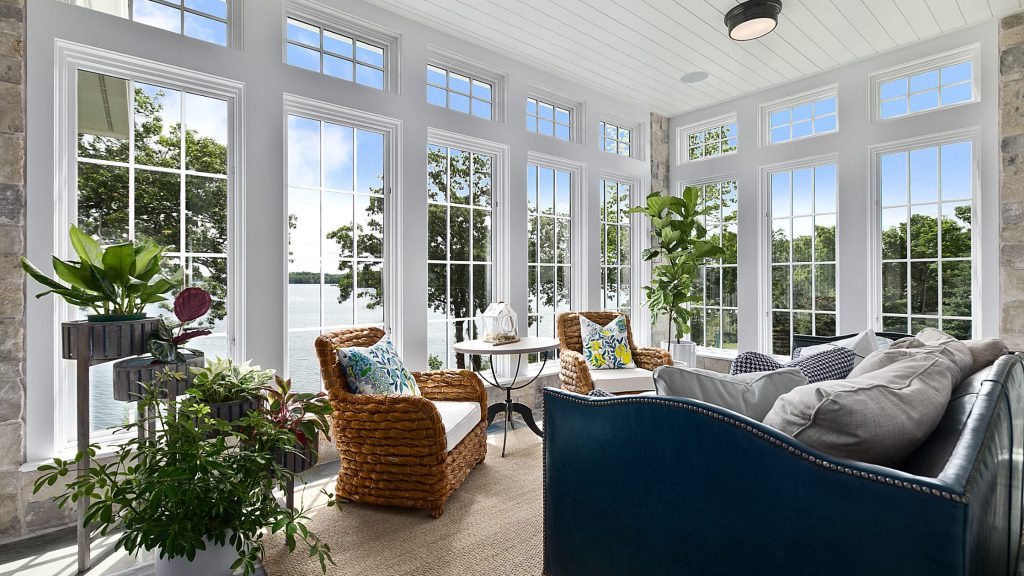
Creating an outdoor space that feels as comfortable as your living room and as stylish as your interior is every homeowner’s dream. A covered deck addition makes that possible, extending your living area while providing protection from the elements. Whether you’re hosting weekend gatherings, enjoying quiet evenings outdoors, or simply adding value to your home, the right design can beautifully blend outdoor comfort and style.
This guide explores how to plan, design, and build a covered deck addition that elevates your lifestyle combining aesthetics, practicality, and lasting quality.
What is a Covered Deck Addition and Why it Matters

A covered deck addition is more than just a roofed outdoor space. It’s an extension of your home engineered to enhance usability, protect furnishings, and provide shade and shelter throughout the year.
Key Benefits:
- Year-round usability: Protects against sun, rain, and snow.
- Enhanced comfort: Keeps your outdoor space cooler in summer and warmer in winter.
- Improved aesthetics: Complements your home’s design with cohesive architectural elements.
- Increased property value: Well-designed outdoor spaces are a top feature for today’s homebuyers.
By integrating a covered structure with your existing architecture, you create a seamless indoor–outdoor transition that adds both function and visual appeal.
The Comfort + Style Equation: Why Both Matter
Outdoor Comfort

A successful outdoor living space should feel inviting and usable every day not just on perfect-weather afternoons.
- Weather protection: A covered deck shields you from UV rays, rain, and wind.
- Temperature control: Add ceiling fans for airflow or patio heaters for cooler months.
- Functional design: Zoning areas for dining, lounging, and cooking enhances usability.
Outdoor Style

Comfort matters but style transforms your deck into a personal retreat.
- Design continuity: Extend your home’s rooflines, colors, and materials to maintain harmony.
- Lighting & texture: Combine warm lighting with layered materials (wood, metal, stone) for an elevated look.
- Decor & finishes: Outdoor rugs, planters, and coordinated furniture complete the aesthetic.
Together, comfort and style turn your deck into a lifestyle statement.
Planning Your Covered Deck Addition
Thoughtful planning ensures your project fits your home, lifestyle, and budget.
1. Assess Your Current Setup

Determine whether your existing deck can support a new roof structure or if a full rebuild is necessary. An experienced contractor can assess:
- Structural integrity of joists and footings.
- Load-bearing capacity for roofing materials.
- Integration with your home’s siding and drainage.
2. Structural & Code Considerations

Every covered addition must meet local building codes for load, wind, and snow resistance.
- Obtain required permits before starting construction.
- Ensure roofing design complements your home’s architecture.
- Consider gutter systems and water drainage to protect the deck below.
3. Climate & Orientation

Your location and lot orientation influence comfort:
- South-facing decks receive more sun ideal for cooler climates.
- North-facing decks may need added light or heating.
- Use natural shade, screens, or retractable panels to fine-tune comfort levels.
Best Materials & Roof Styles for Covered Deck Additions
Choosing the right materials and roof type ensures durability, comfort, and style.
Popular Roof Options

- Gable Roofs – Offer height, great airflow, and strong architectural presence.
- Flat Roofs – Provide a modern, minimalist aesthetic that blends with contemporary homes.
- Pergolas with Adjustable Louvers – Allow customizable light and ventilation—ideal for year-round use.
- Retractable Awnings or Sun Sails – Budget-friendly and flexible for smaller spaces.
Decking & Structural Materials

The material you choose impacts both comfort and style:
- Natural wood (cedar, redwood): Warm, traditional appeal but needs maintenance.
- Composite decking: Low-maintenance, long lifespan, and color variety.
- Thermally modified wood: Combines natural beauty with improved weather resistance.
- Metal or stone accents: Add contrast and sophistication.
Furniture, Lighting & Heating

- Seating: Choose weatherproof cushions and modular furniture for flexibility.
- Lighting: Combine ambient string lights with recessed ceiling fixtures for evening ambiance.
- Heating: Add a fire pit, fireplace, or infrared heaters to extend usability through winter.
When selected thoughtfully, these elements create a seamless outdoor extension that’s comfortable in every season.
Design Ideas & Real-World Inspiration

Here are a few design approaches inspired by successful covered deck additions:
- Modern Minimalist: Flat roof, composite decking, neutral palette, and integrated LED lighting.
- Rustic Retreat: Exposed timber beams, stone fireplace, and soft outdoor fabrics.
- Transitional Comfort: Gable roof, composite floorboards, and wicker furniture for a balanced, timeless look.
How to Design a Covered Deck That Blends Comfort and Style (Step-by-Step)
Step 1: Define Your Goals
Decide how you plan to use your covered deck entertaining guests, dining, or simply relaxing and envision the layout that best supports these activities. Clear goals will guide every design decision.
Step 2: Assess Site & Structure
Evaluate your existing deck to determine whether it can support a cover or if new foundations and framing are needed. Consider factors like weight-bearing capacity, sun exposure, and access to utilities.
Step 3: Choose Roof Type & Materials
Select a roof style gable, flat, pergola, or other that complements your home’s architecture and suits the local climate. Pick durable materials that provide the right balance of shade, ventilation, and weather protection.
Step 4: Budget & Plan
Create a detailed budget covering materials, labor, lighting, and furniture. Factor in potential upgrades or unexpected expenses to ensure your project stays on track financially.
Step 5: Partner with Professionals
Work with a licensed contractor, such as Best Enterprises General Contracting, to ensure proper engineering, permits, and top-quality construction. Experienced professionals can turn your vision into a safe, functional, and beautiful space.
Step 6: Personalize Your Design
Make the space your own with a cohesive color palette, ambient lighting, and furniture that reflects your lifestyle. Accessories like rugs, planters, and cushions can further enhance comfort and style.
Step 7: Maintain & Enjoy
Protect your deck with seasonal cleaning, sealing, and inspections. Regular maintenance preserves its beauty and safety, letting you enjoy your covered deck for years to come.
Conclusion
A thoughtfully designed covered deck addition transforms your outdoor area into a true extension of your home combining comfort, style, and functionality in one cohesive design. From selecting durable materials to choosing the perfect roof structure, each decision contributes to an inviting space that enhances your lifestyle and property value.
When you’re ready to bring your vision to life, Best Enterprises General Contracting is here to help.
Our expert team designs and builds custom deck additions that reflect your home’s personality and your comfort goals.
Contact us today to schedule a consultation and start creating your perfect outdoor retreat.
Eco-Friendly Paving: Sustainable Options for Your Home

Home improvement is no longer just about curb appeal, it’s about creating spaces that are both beautiful and environmentally responsible. With climate change, rising energy costs, and urban flooding becoming growing concerns, more U.S. homeowners are seeking eco-friendly paving solutions. Sustainable paving not only enhances your home’s value and style but also helps conserve resources and reduce your carbon footprint.
In this guide, we’ll explore the best sustainable paving materials, compare their costs and durability, and give you practical tips to choose the right eco paving option for your home.
What Makes Paving Eco-Friendly?

Eco-friendly paving focuses on using sustainable, durable, and low-impact materials that help protect the environment. Unlike traditional concrete or asphalt which can contribute to stormwater runoff, heat absorption, and high carbon emissions, green paving solutions are designed to work with nature, not against it.
These alternatives offer several key benefits:
- Improved Stormwater Management – Permeable materials allow rainwater to filter through the surface, reducing runoff and helping replenish groundwater supplies.
- Reduced Carbon Footprint – Many sustainable pavers are made from recycled or locally sourced materials, minimizing production energy and emissions.
- Better Energy Efficiency – Light-colored or reflective surfaces reduce heat absorption, lowering the urban heat island effect and keeping outdoor areas cooler.
- Enhanced Property Value – Eco-conscious upgrades appeal to modern homeowners and can increase curb appeal and long-term property value.
Why Choose Eco-Friendly Paving?

Traditional paving methods like asphalt and non-permeable concrete often worsen environmental problems. They contribute to stormwater runoff, increase heat absorption, and use energy-intensive materials.
Eco-friendly paving, on the other hand, offers clear advantages:
- Environmental benefits: Allows water infiltration, reduces flooding risks, and lowers carbon emissions.
- Economic value: Many sustainable materials are cost-competitive and last longer, saving you money in the long run.
- Home value boost: Eco paving improves curb appeal and aligns with modern sustainability trends, attracting future buyers.
Popular Sustainable Paving Materials
1. Permeable Concrete & Asphalt

Permeable (or porous) concrete and asphalt are designed with a network of small voids that allow rainwater to pass through the surface into the ground below. This reduces surface runoff, minimizes flooding risks, and helps replenish groundwater. These materials are especially beneficial in urban environments and flood-prone areas where stormwater management is critical.
They are also compatible with local stormwater regulations and can contribute to achieving green building certifications such as LEED.
Pros:
- Durable and long-lasting
- Excellent for stormwater management
- Reduces urban heat island effect
- Widely available and easy to source
Cons:
- Requires periodic vacuuming or pressure washing to prevent clogging
- May not perform as well under heavy vehicular loads if not properly installed
2. Recycled & Repurposed Materials

Recycled paving options—such as reclaimed asphalt pavement (RAP), rubber from used tires, crushed concrete, and even glass aggregates—help reduce construction waste while conserving natural resources. These eco-friendly materials offer a sustainable and often budget-friendly alternative to traditional paving.
They’re ideal for driveways, walkways, or low-traffic areas where aesthetics and sustainability are both priorities. Additionally, using recycled materials supports circular economy practices by giving old materials a second life.
Pros:
- Cost-effective and environmentally responsible
- Reduces landfill waste and resource consumption
- Often eligible for green building credits
Cons:
- Quality and consistency can vary depending on supplier
- May have a shorter lifespan or less uniform appearance than new materials
3. Natural Stone & Brick

Natural stone (such as granite, slate, or limestone) and clay brick have been trusted paving materials for centuries. These products are not only timeless in design but also extremely durable and recyclable. When installed using permeable patterns—like open joints filled with gravel—they combine classic beauty with modern sustainability.
Both materials age gracefully and can be reused multiple times, making them ideal for long-term eco-conscious landscaping.
Pros:
- Exceptional durability and longevity
- Naturally recyclable and low in embodied energy
- Elegant and versatile aesthetic appeal
Cons:
- Higher upfront cost and installation complexity
- May require professional labor for precise alignment and drainage design.
4. Permeable Pavers (Concrete & Grid Systems)

Permeable pavers include interlocking concrete blocks, plastic grids, or modular tiles filled with grass, gravel, or crushed stone. These systems create stable, permeable surfaces that allow rainwater to infiltrate naturally while maintaining load-bearing strength. They are one of the most popular solutions for sustainable driveways, patios, parking areas, and garden paths.
Advanced grid systems can even integrate with rainwater harvesting or biofiltration setups, enhancing their environmental benefits.
Pros:
- Highly permeable and efficient in reducing stormwater runoff
- Customizable in color, texture, and pattern
- Helps reduce heat buildup on surfaces (cooler underfoot)
Cons:
- Higher initial installation cost compared to traditional paving
- Requires regular maintenance to prevent weed growth and sediment buildup
How to Choose Eco-Friendly Paving for Your Home
Selecting the right eco-friendly paving solution depends on a few important factors that balance sustainability, aesthetics, and practicality:
- Climate: Permeable paving performs best in regions with frequent rainfall, while natural stone is ideal for drier climates.
- Budget: Recycled materials are often the most cost-effective, whereas natural stone offers a premium, long-lasting finish.
- Durability: Brick and natural stone can last over 50 years with minimal maintenance, while permeable concrete may require earlier upkeep.
- Aesthetic Preferences: Choose materials that complement your home’s architecture and blend seamlessly with your landscaping design.
Quick Comparison Table
| Material | Cost (per sq. ft.) | Lifespan | Best Use Case |
| Permeable Asphalt/Concrete | $5–$12 | 20–30 years | Driveways, parking |
| Recycled Asphalt/Concrete | $3–$8 | 15–25 years | Budget-friendly driveways |
| Natural Stone/Brick | $10–$20 | 50+ years | Patios, walkways, luxury driveways |
| Permeable Pavers/Grid | $8–$15 | 25–40 years | Driveways, patios, garden paths |
Benefits of Eco-Friendly Paving
Choosing sustainable paving isn’t just good for the environment, it’s a smart investment for homeowners. Here’s how eco-friendly paving solutions make a lasting impact:
1. Stormwater Management

Traditional impervious surfaces force rainwater into storm drains, often causing runoff, erosion, and flooding. Eco-friendly paving systems — such as permeable concrete, pavers, and gravel grids — allow water to infiltrate the soil naturally.
This process helps:
- Recharge groundwater supplies
- Reduce pressure on municipal drainage systems
- Filter pollutants before they reach rivers and lakes
By managing rain where it falls, sustainable pavements contribute directly to local water conservation and flood prevention efforts.
2. Reduced Urban Heat Islands

Conventional asphalt surfaces absorb and retain heat, raising local air temperatures — especially in densely built neighborhoods.
Eco-friendly paving materials, on the other hand, use light-colored, reflective, or vegetated surfaces that:
- Reflect more sunlight (higher solar reflectance index)
- Maintain cooler surface temperatures
- Create more comfortable outdoor environments
This cooling effect can also lower nearby energy consumption by reducing the need for air conditioning in adjacent homes and buildings.
3. Cost Savings Over Time

While the initial installation cost of sustainable paving may be slightly higher, the return on investment is significant.
Eco-friendly materials tend to:
- Require less frequent repairs and resurfacing
- Withstand temperature fluctuations and heavy rainfall better
- Reduce drainage infrastructure costs
Over time, these factors translate into lower maintenance expenses and a longer pavement lifespan, making green paving both economical and responsible.
4. Enhanced Property Value & Curb Appeal

Sustainability is now a key consideration for homebuyers. Eco-conscious outdoor upgrades such as permeable driveways, recycled materials, and natural stone walkways signal environmental awareness and modern design.
Benefits include:
- Increased marketability to eco-minded buyers
- Improved aesthetics and functionality
- Potential eligibility for green building incentives or tax credits
By integrating sustainability into your landscape, you’re not only reducing your environmental footprint but also enhancing your property’s overall value and appeal.
Conclusion
Eco-friendly paving is more than a design choice; it’s a commitment to sustainability, long-term savings, and enhanced curb appeal. From permeable pavers that prevent flooding to natural stone that elevates outdoor aesthetics, there’s a solution for every U.S. homeowner looking to make a responsible upgrade.
At Best Enterprises General Contracting, we specialize in sustainable construction and paving solutions designed for the unique needs of American homes. If you’re ready to transform your outdoor space with eco-friendly paving, contact us today to explore your options.
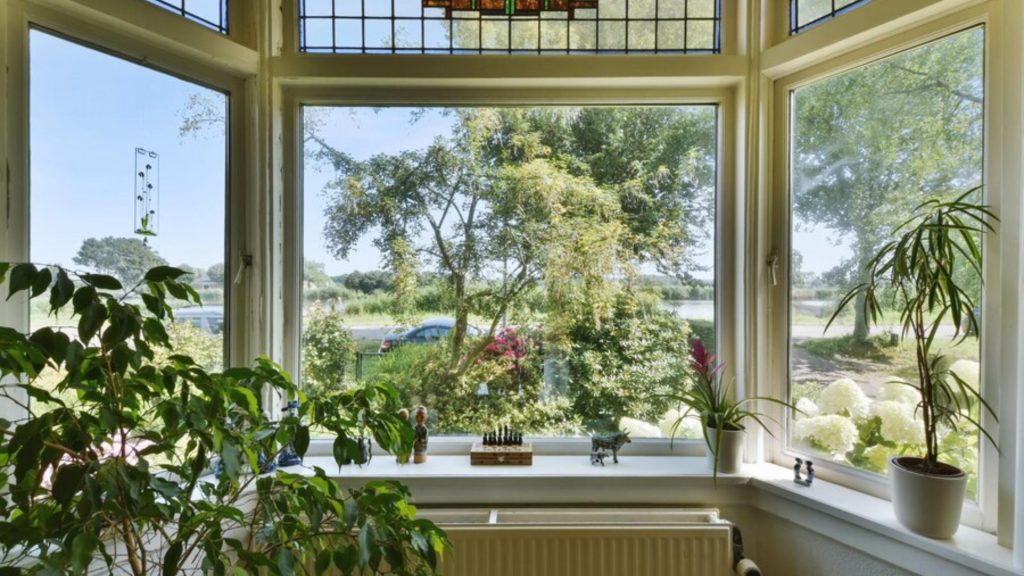
Bringing the Outside In: The Rise of Floor-to-Ceiling Windows

In today’s architecture and design world, floor-to-ceiling windows have become a symbol of modernity, luxury, and connection with nature. This architectural trend is not only about aesthetics but also about functionality. By allowing unobstructed views of the outdoors and flooding spaces with natural light, these windows are transforming homes across the United States. Whether you’re renovating your current living space or building a new home, this article will explore the rise of floor-to-ceiling windows, their benefits, the installation process, and how they can enhance your home’s design.
The Appeal of Floor-to-Ceiling Windows

Floor-to-ceiling windows flood interiors with natural light, enhance mood, and cut down on artificial lighting needs. They frame sweeping views whether of gardens or city skylines and make even small spaces feel larger and more open. By blending indoors with the outdoors, they create a seamless sense of connection and spaciousness.
1. Maximizing Natural Light and Views

One of the most significant advantages of floor-to-ceiling windows is the influx of natural light they bring into a room. Natural light has numerous benefits, from improving mood and productivity to creating a welcoming and spacious atmosphere. These windows allow you to take full advantage of daylight, reducing the need for artificial lighting during the day. Furthermore, they offer expansive, panoramic views of your surrounding environment, whether it’s the serene beauty of your garden or the vibrant cityscape.
2. Creating a Sense of Openness and Space

Floor-to-ceiling windows also have a profound impact on the spatial dynamics of a room. By eliminating traditional walls or partitions, these windows make even smaller rooms feel more open and airy. The design creates a seamless flow between indoor and outdoor spaces, ideal for those looking to blend their interior with nature. This is especially beneficial in compact urban homes or apartments where every square foot counts.
Benefits of Floor-to-Ceiling Windows
1. Energy Efficiency and Natural Ventilation

When installed correctly, modern floor-to-ceiling windows can be energy-efficient. With high-performance glass and proper insulation, these windows can help regulate indoor temperatures by providing natural ventilation. During cooler months, these windows can trap warmth from the sun, reducing the need for artificial heating. In warmer months, they can be opened to allow fresh air to flow in, reducing the reliance on air conditioning systems.
2. Aesthetic Appeal and Modern Design Trends

These windows are often associated with sleek, minimalist designs that are in high demand in today’s home design trends. The clean lines and unobstructed views they provide fit perfectly with modern and contemporary architectural styles. Whether used in a living room, kitchen, or bedroom, floor-to-ceiling windows can serve as both a functional element and a focal point, enhancing the overall aesthetic of the space.
3. Connection to Nature

Incorporating nature into living spaces is a growing trend known as biophilic design. Floor-to-ceiling windows play a crucial role in this movement by bringing the outdoors inside. The large glass panes allow homeowners to enjoy the beauty of nature year-round, regardless of weather conditions. This seamless connection with nature promotes well-being and enhances the quality of life.
Installation Process: How to Install Floor-to-Ceiling Windows
Key Considerations Before Installation
Installing floor-to-ceiling windows is a complex process that requires careful planning and attention to detail. Several key factors must be considered to ensure the project is successful.
1. Structural Integrity

Floor-to-ceiling windows are significantly heavier than traditional windows, and their size places additional strain on the walls and framing. It’s essential to assess the structural integrity of your home or building before installation. In some cases, you may need to reinforce the surrounding walls and foundation to bear the weight of the windows properly. A structural engineer or contractor can evaluate the support required for the windows.
2. Framing Modifications

Floor-to-ceiling windows require larger openings than typical windows, which may necessitate modifications to the framing. This could involve cutting or expanding the current window space, which might require reinforcing the surrounding structure to accommodate the new size.
3. Building Codes and Permits

Local building codes and regulations must be checked before beginning the installation. Depending on your location, permits may be required to install large windows, especially if structural changes or modifications are involved. It’s important to work with a professional who is familiar with local building codes to avoid delays and ensure compliance with regulations.
4. Weatherproofing and Insulation

To maximize the energy efficiency of your floor-to-ceiling windows, you must carefully consider weatherproofing and insulation. Modern windows are often equipped with double-glazed or Low-E glass, which helps to prevent heat loss and gain. Proper sealing around the frames is essential to keep drafts and moisture out, which ensures the longevity and performance of your windows.
Step-by-Step Guide to Installation
While the process of installing floor-to-ceiling windows can vary depending on the type of window and the specifics of your building, here is an overview of the general installation steps:
1. Preparation and Removal

The installation begins by removing any existing windows and preparing the opening. This involves carefully removing old frames, cleaning the surrounding area, and preparing the wall structure to accommodate the new, larger windows. The removal process should be done carefully to avoid damaging the surrounding areas.
2. Framing Adjustments

Once the existing window is removed, the next step is to adjust the framing to fit the new, larger window. Depending on the design, the existing frame may need to be reinforced or replaced with new supports. Steel or wooden reinforcements are commonly used to ensure the frame can hold the weight of the large glass panes securely.
3. Window Fitting

With the structural adjustments complete, the next step is fitting the window frame into the prepared opening. This is a delicate process, as the window must be level and properly aligned to ensure it fits perfectly. During this phase, the window is secured in place using specialized fasteners and anchors. It’s crucial that the frame is installed correctly to prevent issues with drafts or leaks.
4. Installing the Glass

Once the frame is secured, the high-performance glass is carefully installed into the frame. This glass is typically double-glazed or low-emissivity (Low-E) to provide superior insulation and energy efficiency. The glass must be handled with care to avoid breakage, and it should be sealed tightly within the frame to prevent air or water infiltration.
5. Sealing and Weatherproofing

After the glass is installed, the final step is to ensure that the window is properly sealed. A high-quality sealant is applied around the edges of the frame to prevent any drafts or moisture from entering the room. Weatherproofing is especially important in areas with extreme temperatures or high humidity to maintain the window’s performance over time.
6. Final Inspection and Adjustment

Once the installation is complete, a thorough inspection should be conducted to ensure everything is in place. The window should be checked for any gaps, unevenness, or issues with functionality. Make adjustments as necessary to ensure proper operation. If needed, the installer will also conduct a test to verify that the window opens, closes, and locks securely.
Pros and Cons of Floor-to-Ceiling Windows
Pros:
- Unmatched Aesthetics: Floor-to-ceiling windows provide an unmatched aesthetic appeal, offering panoramic views that transform the ambiance of a room. Their minimalist design adds a modern touch to any space, making them a popular choice for upscale homes and commercial buildings.
- Natural Light: The influx of natural light provided by floor-to-ceiling windows reduces the need for artificial lighting, lowering electricity costs and creating a bright, inviting atmosphere.
- Increased Property Value: Homes with floor-to-ceiling windows often command higher resale values due to their luxurious and modern appeal.
Crons:
- Privacy Issues: In urban or densely populated areas, floor-to-ceiling windows can compromise privacy, as they offer little protection from prying eyes. While window treatments like sheer curtains or blinds can help, they can obstruct the very features homeowners are trying to showcase.
- Energy Efficiency Concerns: Although modern floor-to-ceiling windows are designed to be energy-efficient, poorly installed or older windows can result in heat loss during winter or excessive heat gain in the summer. Investing in high-quality, double-glazed windows can mitigate these issues.
- Cost: The cost of installing floor-to-ceiling windows can be significant. The windows themselves are often more expensive than traditional ones, and installation requires skilled labor and careful planning, which can drive up the cost.
Sustainability and the Future of Floor-to-Ceiling Windows

As energy efficiency becomes an increasingly important consideration in construction, floor-to-ceiling windows are evolving to meet these demands. Modern innovations in glass technology, such as low-emissivity (Low-E) coatings and double glazing, help to reduce heat transfer and improve insulation. These energy-efficient windows contribute to sustainable building practices by decreasing reliance on heating and cooling systems, thereby reducing a home’s carbon footprint.
In the future, we can expect to see even more environmentally friendly options, including windows made from recycled materials and those designed to harvest solar energy.
Conclusion
Floor-to-ceiling windows have proven to be more than just a design trend; they represent a shift toward more open, light-filled, and sustainable living spaces. These windows enhance the aesthetics of a home, improve energy efficiency, and offer a unique connection to nature. While they come with their challenges, such as privacy concerns and high installation costs, the benefits they offer make them a worthy consideration for modern homeowners.
For those interested in exploring floor-to-ceiling windows for their own spaces, Best Enterprises General Contracting provides expert advice and professional installation services tailored to your design needs. Let us help you bring the outside in and transform your living environment.
Eco-Friendly Materials for Your Next Kitchen Renovation

When planning a kitchen renovation, the choice of materials can affect both your home’s appearance and the environment. The kitchen is the heart of the home. Over the years, it has changed from a space focused solely on function to one that is both functional and sustainable. Choosing eco-friendly materials for your kitchen renovation enhances its visual appeal. Moreover, it helps save energy, reduce waste, and create a healthier living environment.
In this guide, we’ll explore the best eco-friendly materials for your kitchen renovation. You’ll learn how to make informed choices for a sustainable and modern kitchen.
Why Choose Sustainable Kitchen Materials?

Choosing sustainable kitchen materials goes beyond trends. It is a conscious decision that benefits both the environment and your home. Standard building materials often rely on non-renewable resources. They also contribute to environmental damage. In contrast, sustainable materials are made with nature in mind. They reduce waste, require less energy to produce, and leave a smaller carbon footprint.
Here are a few key reasons why opting for eco-friendly materials in your kitchen renovation is a smart choice:
- Energy Savings: Sustainable materials and energy-efficient appliances help reduce your home’s energy consumption, leading to lower utility bills while promoting energy conservation. Over time, these choices can save you money and reduce your household’s carbon footprint.
- Reduced Environmental Impact: Materials like bamboo, recycled glass, and reclaimed wood are not only renewable but also help reduce waste. By incorporating these materials into your kitchen, you’re making a direct contribution to minimizing resource depletion and diverting waste from landfills.
- Healthier Living Environment: Many traditional materials can release harmful chemicals, such as VOCs (volatile organic compounds), into your home. By choosing non-toxic materials—like natural stone countertops, low-VOC paints, and formaldehyde-free cabinetry—you ensure your kitchen is a healthier, safer space for you and your family.
Making the switch to sustainable materials means creating a kitchen that’s as eco-conscious as it is stylish—one that benefits both you and the planet.
Top Eco-Friendly Materials for Kitchen Renovations
1. Bamboo Kitchen Cabinets

Bamboo is an exceptional eco-friendly material that’s becoming a top choice for kitchen cabinetry. Not only is it durable and visually appealing, but it’s also one of the fastest-growing plants on Earth, making it a highly renewable resource with minimal environmental impact. Bamboo cabinets are lightweight, resistant to moisture, and can be finished with non-toxic stains or paints, ensuring they’re safe for your home. Whether you’re designing a modern, sleek kitchen or a more traditional space, bamboo’s versatility will complement any style.
Benefits
- Highly durable and long-lasting: Bamboo is naturally resilient and built to withstand everyday wear and tear.
- Renewable and fast-growing: As one of the most sustainable materials, bamboo regenerates quickly and doesn’t require replanting.
- Aesthetically versatile: It can suit both contemporary and classic kitchen designs, offering a warm, natural look.
2. Recycled Glass Countertops

Recycled glass countertops are rapidly gaining popularity for their stylish, sustainable appeal. These countertops are crafted from post-consumer glass waste, combined with other recycled materials like resin, cement, or mirror glass, resulting in a durable and attractive surface. Choosing recycled glass not only reduces the need for new raw materials but also prevents a significant amount of glass waste from filling landfills.
Benefits
- Unique, customizable designs: With various color options and textures, you can create a one-of-a-kind countertop that reflects your personal style.
- Highly durable and low-maintenance: Glass countertops are non-porous, resistant to stains, and easy to clean, making them a practical option for a busy kitchen.
- Made from 100% recycled materials: A perfect example of upcycling, offering an environmentally responsible alternative to conventional countertops.
3. Non-Toxic Materials for a Healthier Home

Creating a healthy home environment is just as important as aesthetics, and non-toxic materials play a critical role in ensuring your kitchen remains safe for you and your family. Materials such as natural stone, low-VOC paints, and formaldehyde-free plywood contribute to better indoor air quality by minimizing the release of harmful chemicals. By selecting these options, you are creating a healthier kitchen free from pollutants and toxins, making it a safer space for everyday living.
Benefits
- Natural stone countertops (e.g., granite, quartzite): These non-toxic materials are durable and add an elegant, natural touch to your kitchen.
- Zero-VOC paints: These low- or no-volatile organic compound paints eliminate harmful emissions, making your kitchen’s air quality cleaner.
- Formaldehyde-free plywood for cabinetry and shelving: Essential for reducing the release of potentially harmful gases into your home’s environment.
4. Energy-Efficient Kitchen Appliances

Energy-efficient appliances are a cornerstone of any sustainable kitchen renovation. These modern appliances consume less electricity and water, ultimately reducing both your environmental impact and utility bills. Refrigerators, dishwashers, and ovens that have earned the ENERGY STAR label are known for their high efficiency, helping you save money while reducing your carbon footprint.
Benefits
- Lower energy consumption and reduced carbon footprint: Energy-efficient appliances consume less power, helping to decrease greenhouse gas emissions.
- Water-saving options for dishwashers and faucets: Many energy-efficient models are designed with built-in water-saving features, which can help conserve one of our most precious resources.
- Long-term cost savings on utility bills: Though these appliances may have a higher upfront cost, their energy and water-saving capabilities lead to significant savings over time.
How to Choose the Right Materials for Your Kitchen

Choosing the right eco-friendly materials for your kitchen can seem overwhelming, but with the right knowledge, the process becomes easier. Here are some tips to help guide your decisions:
- Consider durability: Sustainable materials should last longer, so choose options like bamboo or stone that will stand the test of time.
- Think about maintenance: Materials like recycled glass and natural stone are low-maintenance and easier to care for over the long run.
- Aesthetic appeal: Choose materials that complement the existing design of your home while maintaining eco-friendliness. For example, bamboo is perfect for a modern, minimalist kitchen, while reclaimed wood works well in rustic spaces.
- Budget: Sustainable materials can sometimes be more expensive upfront, but the long-term savings in energy bills and durability can offset the initial costs.
Conclusion
Choosing eco-friendly materials for your kitchen renovation is a smart choice for the environment and your wallet. From bamboo cabinets and recycled glass countertops to energy-efficient appliances and water-saving fixtures, there are plenty of sustainable options that will make your kitchen both beautiful and eco-friendly. By opting for these materials, you’re not only enhancing your home but also contributing to a greener future.
Take the first step today towards a more sustainable kitchen by exploring eco-friendly materials that suit your design preferences and environmental goals.
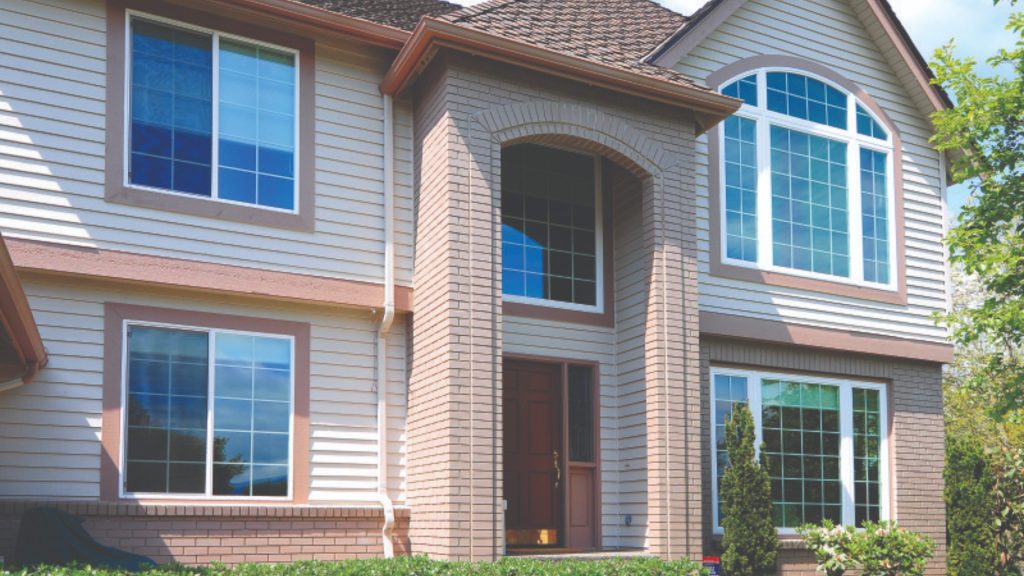
Custom-Shaped Windows That Define Your Home’s Character

Windows are more than openings for light; they are design features that shape your home’s style. Custom-shaped windows take this further by turning your space into something unique and personal. Whether you are building, remodeling, or adding a feature, these windows offer endless design choices.
In this article, we’ll cover the different types of custom-shaped windows, their benefits, costs, and how they improve energy efficiency. You’ll also find expert tips to choose the right option for your home.
What are Custom-Shaped Windows?
Custom-shaped windows are any windows designed to fit non-standard shapes and sizes, created to complement a home’s architectural style. Unlike traditional rectangular or square windows, custom-shaped windows can take on many forms, including arches, circles, triangles, and even more intricate designs.
These windows can serve as a focal point, adding visual appeal and enhancing your home’s overall look. Whether you’re opting for a dramatic cathedral-style arch, a modern triangular shape, or a circular skylight, custom windows allow for personalization that standard windows simply cannot offer.
Popular Types of Custom-Shaped Windows
1. Arched & Cathedral Windows

Arched windows are a timeless architectural feature, particularly suited to traditional or Mediterranean-style homes. Their graceful curve creates an air of elegance and charm, often placed above doorways, in living rooms, or as part of large picture windows. Arched windows not only add beauty but also allow for larger panes of glass, which can enhance views and natural light.
Cathedral windows take the arched design to a grander scale, commonly seen in churches or monumental buildings. They are often much larger and more ornate, with intricate detailing, including stained glass, which magnifies their dramatic effect. These windows work wonderfully in spaces with high, vaulted ceilings, offering a sense of awe and grandeur. The combination of size and curvature transforms these structures into landmarks.
2. Skylight & Roof Windows
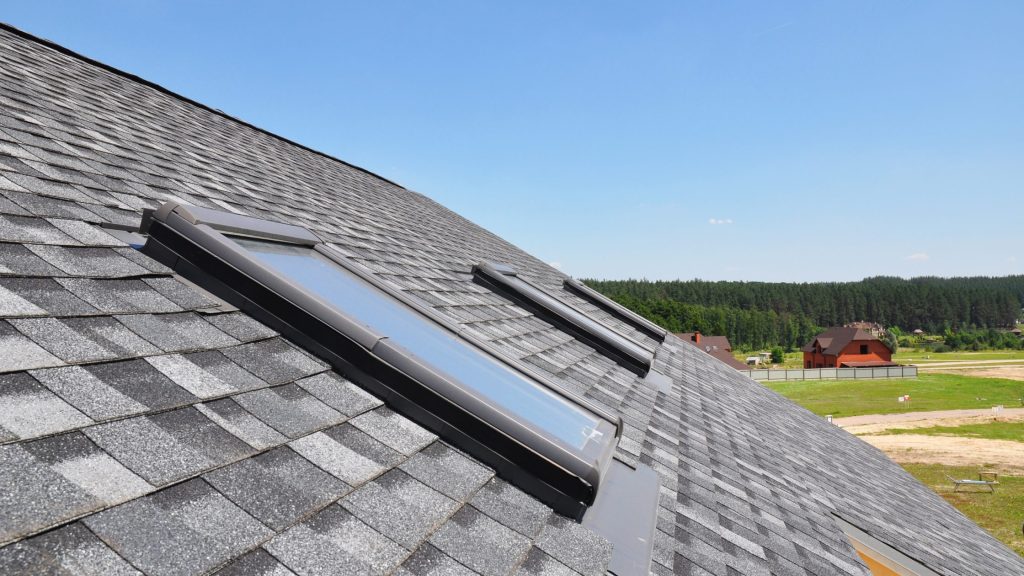
Skylights and roof windows bring natural light directly from above, making them ideal for spaces that typically lack access to outside light, such as attics, bathrooms, and hallways. Custom skylights can be tailored to fit any architectural style, with designs ranging from simple rectangular or circular shapes to more complex, multi-pane configurations. By introducing light from above, they can create a feeling of openness and spaciousness, especially in rooms with low ceilings.
Skylights improve ventilation. Hot air rises and escapes through them, which boosts airflow and indoor air quality. Fixed, vented, and even automated models are available, giving homeowners control over both light and ventilation. Additionally, skylights can add a touch of luxury and tranquility, particularly when placed in bedrooms or bathrooms.
3. Triangular, Circular & Specialty Shapes
For homeowners seeking a more unique and artistic look, triangular, circular, and other custom shapes provide a striking design element. These windows are increasingly popular in modern and contemporary homes, where the goal is to create visual intrigue and blend functionality with style.
A round window, often used in places like hallways or stairwells, can act as an unexpected design feature. It offers smooth lines that contrast beautifully with the more angular shapes typically found in home architecture. Triangular windows, often placed in corners or as part of a roofline, add a bold, geometric flair to any room. They’re perfect for creating a conversation piece or accentuating a specific area in your home.
Beyond these common shapes, custom windows can be designed in a wide variety of forms, hexagons, octagons, and even abstract forms, depending on the desired aesthetic. These windows let in light and double as functional art.
4. Decorative Living Room Designs
In the living room, custom-shaped windows can make a dramatic statement. These windows are often crafted to enhance the overall design of the room, adding a unique visual element that plays with natural light and space. Oval windows, for example, are sophisticated and elegant, and when combined with trim or framing, they can complement both traditional and modern decor.
Geometric patterns, like square or diamond-shaped windows, are also a popular choice, especially for homeowners looking to introduce a contemporary, minimalistic style. Asymmetrical windows can provide an avant-garde look, breaking away from conventional window designs and adding a sense of unpredictability to the room. These windows can be strategically placed to create balance in the design or to draw attention to a specific feature, such as a fireplace or piece of artwork.
Custom living room windows can also be integrated with other design elements, such as built-in seating, window seats, or shelving, creating a harmonious flow in the room’s layout. The incorporation of natural light enhances the overall ambiance, providing a bright, airy feel that’s perfect for relaxation and social gatherings.
Benefits of Custom-Shaped Windows
1. Enhancing Curb Appeal & Resale Value
Custom-shaped windows are an excellent way to make your home stand out. Whether it’s a charming arched window above the front door or a modern geometric design, these windows create a distinctive look that can elevate your home’s exterior. A home with unique windows has a more inviting and sophisticated appearance, which can set it apart in a competitive real estate market.
The aesthetic appeal of custom windows can also contribute to higher resale value. Homes with thoughtful design elements, like custom-shaped windows, often attract buyers looking for something different from standard, cookie-cutter homes. These windows show quality and style, creating a lasting impression. Whether you’re selling your home now or years down the road, custom windows may play a significant role in boosting your home’s marketability.
2. Maximizing Natural Light & Energy Efficiency
One of the standout advantages of custom-shaped windows is their ability to maximize natural light. Unlike standard windows, custom windows can be strategically placed to allow sunlight to flood into previously dark areas, such as corners, hallways, or attic spaces. This results in a brighter, more inviting home without relying on artificial lighting. Skylights and roof windows, for example, can bathe a room in daylight while offering a fresh perspective from above.
In addition to enhancing natural light, many custom windows are designed with energy efficiency in mind. They can be made with high-performance glass that keeps your home warmer in the winter and cooler in the summer by reducing heat transfer. This leads to less reliance on heating and air conditioning systems, contributing to lower energy consumption. Custom windows can also be fitted with insulated frames, which help to further improve the energy efficiency of your home.
3. Creating a Unique Interior Atmosphere
Windows play a pivotal role in the atmosphere of a room. Custom-shaped windows are a powerful tool for enhancing the aesthetic and emotional ambiance of your living space. Standard windows often have a generic, predictable look, but custom designs allow for personal expression. Whether you’re aiming for a rustic, classic, or modern look, custom windows can help you create an environment that reflects your individual style.
Beyond design, custom windows can affect how you interact with the space. A large custom window might allow for panoramic views, creating a peaceful, open environment, or offer a feeling of intimacy and coziness depending on where it’s placed.
4. Long-Term Cost Savings vs. Standard Windows
While custom windows require a larger initial investment, they provide significant long-term savings. Energy-efficient designs can lower heating and cooling costs by maintaining a comfortable indoor climate without over-reliance on HVAC systems. Advanced materials, such as energy-efficient glass and insulated frames, help improve thermal performance, reducing energy consumption.
Manufacturers build custom windows with high-quality, durable materials. They last longer and need fewer repairs than standard windows. This durability leads to savings over time, as you’ll avoid frequent maintenance costs.
Moreover, the aesthetic and functional benefits of custom windows may reduce the need for other expensive home renovations. These windows can enhance your home’s value, offering both style and energy efficiency without the need for major upgrades like reworking entire walls or layouts. The combination of improved energy savings, reduced maintenance, and increased home value makes custom windows a smart long-term investment.
Real-Life Inspiration & Case Studies
Let’s take a look at how custom-shaped windows have transformed homes:
Casa Soberanes – Monterey, California

Casa Soberanes, an adobe home dating back to the 1840s, underwent a preservation project to maintain its historic character while improving its energy efficiency. The project involved installing Castle Window Covers acrylic protective covers designed to insulate the windows.
These custom covers played a key role in safeguarding the home from humidity and UV rays, both of which are damaging to old adobe structures and historical artifacts. The use of these covers helped preserve the integrity of the building while allowing for significant energy efficiency improvements.
By protecting the original windows with Castle Window Covers, the project maintained the building’s original look and feel, while reducing energy costs. This approach is a perfect example of how custom solutions can modernize a historic structure without compromising its architectural heritage.
How to Choose the Right Custom-Shaped Window for Your Home
When choosing custom-shaped windows, it’s essential to consider your home’s overall architectural style and the specific function of the window. If you’re adding windows to a traditional-style home, arched or oval windows may complement the design. For modern homes, sharp, geometric shapes or skylights might better suit the aesthetic.
Additionally, consider energy ratings, materials, and the overall placement of the window. Working with a professional contractor can help ensure that your custom windows are installed properly and match your vision. For expert installation, Best GC Services provides high-quality services that can guide you through your window choices and ensure a seamless installation.
Conclusion
Custom-shaped windows are a fantastic way to elevate the design and functionality of your home. Whether you’re enhancing your living room, adding natural light with skylights, or creating a unique design with architectural windows, the possibilities are endless.
Ready to redefine your home with custom-shaped windows? Contact Best Enterprises General Contracting today for a free consultation and start transforming your home’s character with expert window designs. For reliable and professional installation, check out our Window Installation Services to ensure your custom windows are installed with precision and care.
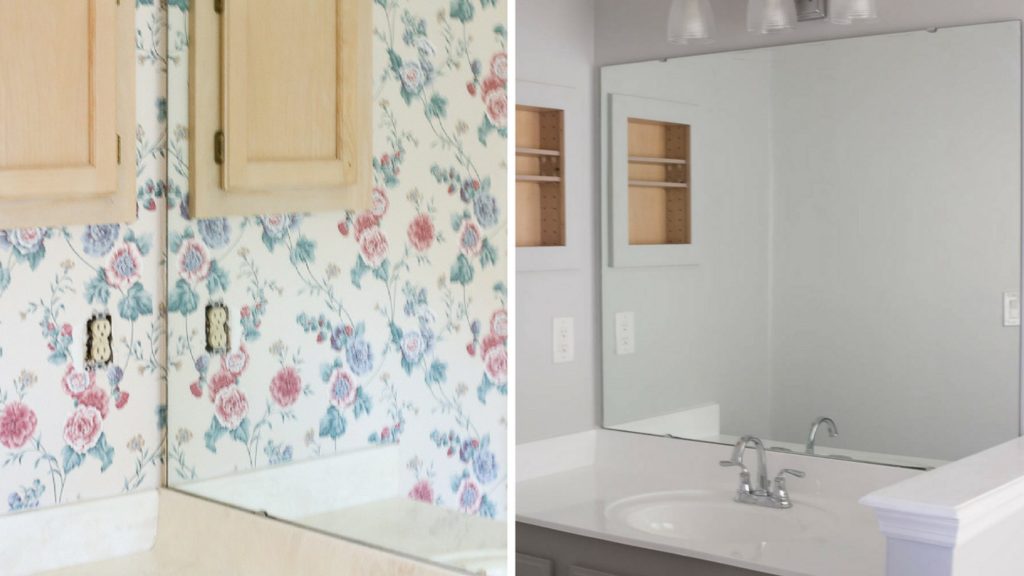
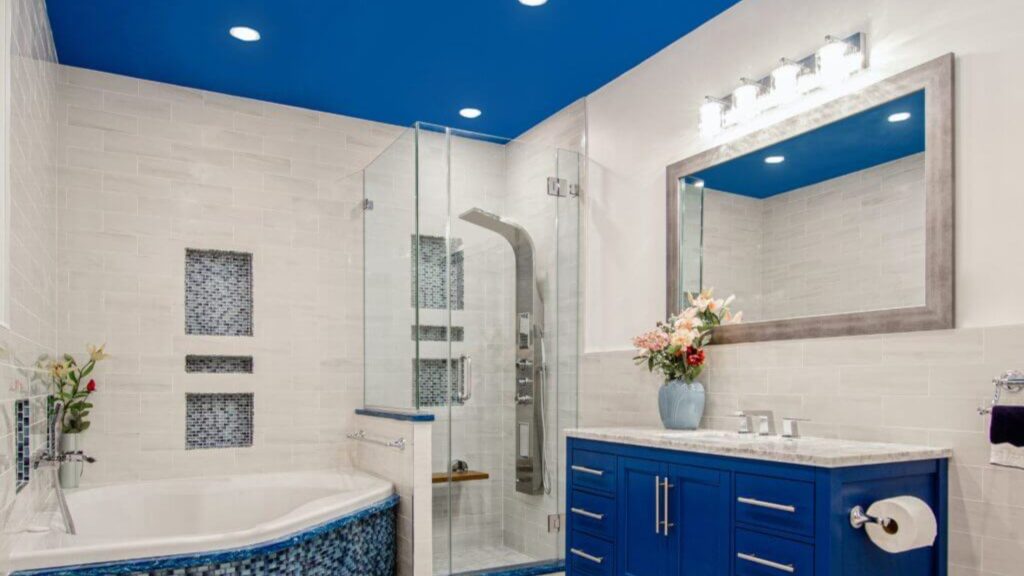
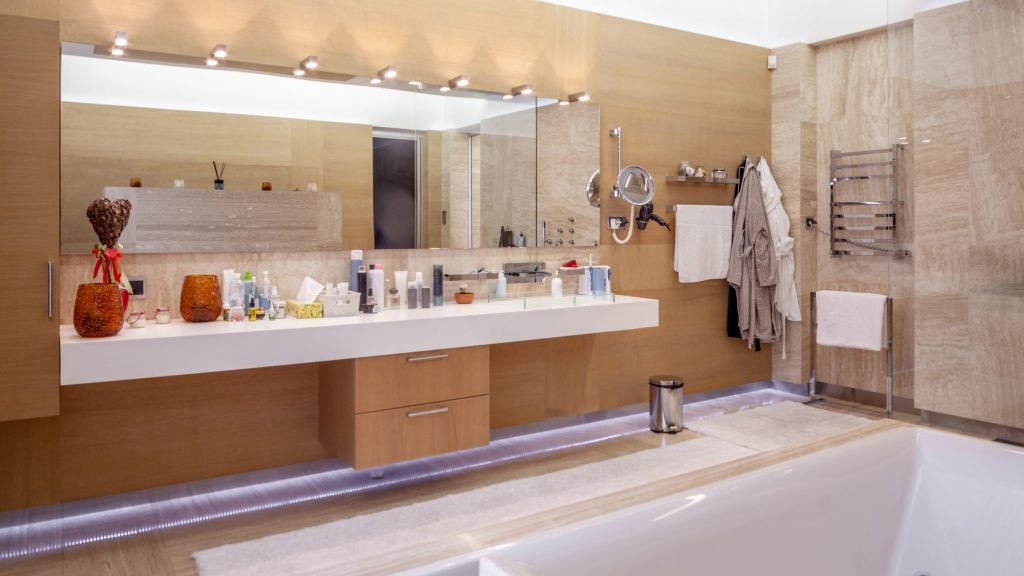
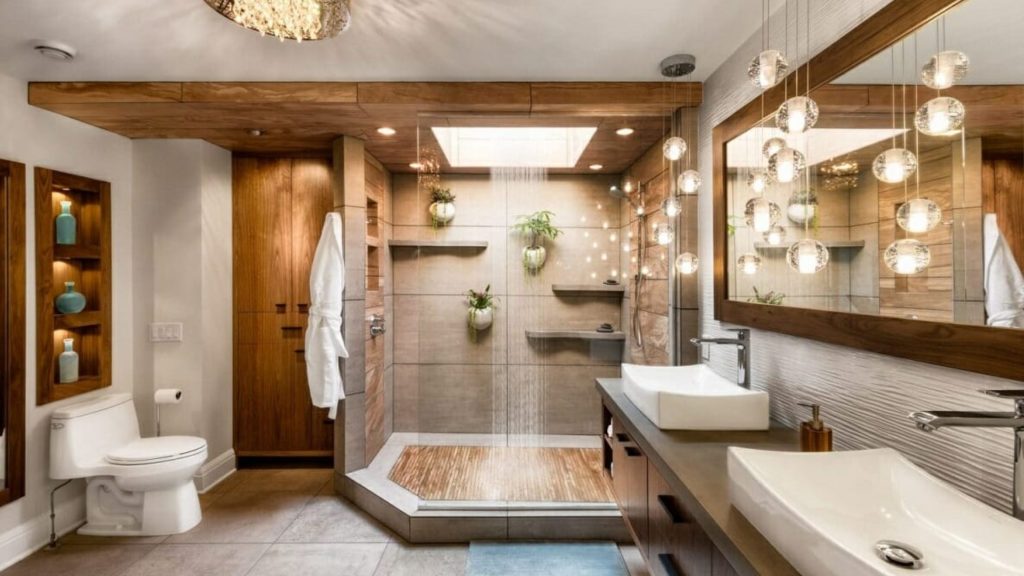
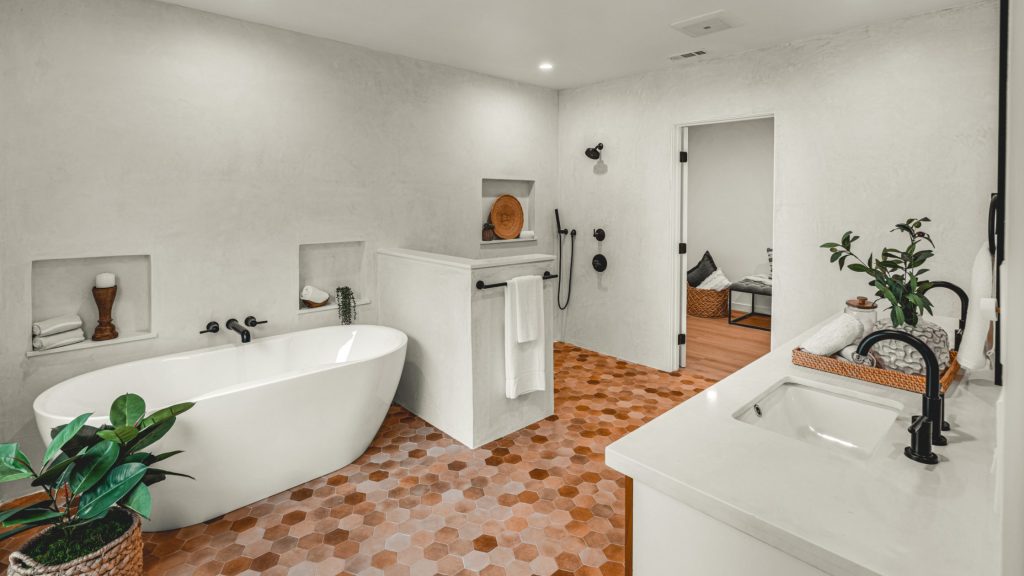
The Ultimate Guide to Budget-Friendly Bathroom Renovations

A bathroom renovation is one of the smartest investments a homeowner can make. Not only does it add comfort and functionality to your daily life, but it can also boost the value of your home. The challenge? Bathroom remodels in the U.S. typically cost $10,000–$15,000 for a mid-range project, and luxury remodels can easily exceed $25,000.
But here’s the good news: you don’t need a massive budget to transform your bathroom into a beautiful, functional space. With careful planning, smart choices, and a mix of DIY-friendly updates and strategic investments, you can achieve a stylish remodel for a fraction of the cost.
This ultimate guide will walk you through everything you need to know about budget-friendly bathroom renovations from cost breakdowns and affordable remodel ideas to a step-by-step guide, small bathroom solutions, and even a real-world case study.
Cheap Yet Stylish Ways to Renovate Your Bathroom
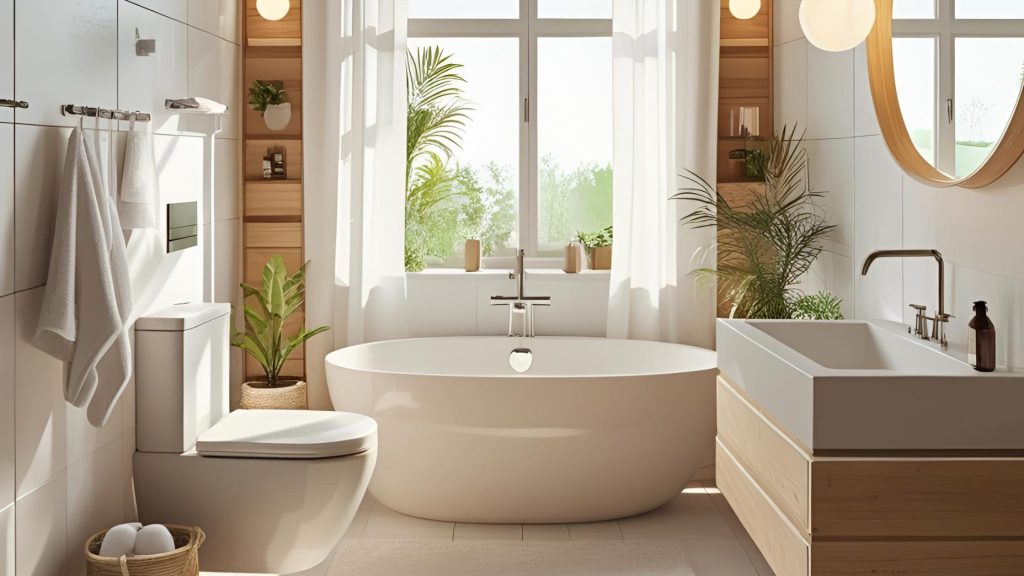
Renovating your bathroom on a budget doesn’t have to mean compromising on style. With a few smart, budget-friendly upgrades, you can achieve a chic and functional space. Here are some creative hacks to give your bathroom a fresh look without breaking the bank:
1. DIY Upgrades for Instant Style – Add a modern touch with peel-and-stick backsplashes, removable wallpaper, or floating shelves. These DIY solutions are easy to install, affordable, and can instantly elevate the look of your bathroom.
2. Lighting That Makes an Impact – Outdated light fixtures can make even the most beautiful bathroom feel drab. Replace old sconces with stylish, budget-friendly options like pendant lights or recessed LEDs. A simple lighting upgrade can completely change the ambiance of your space.
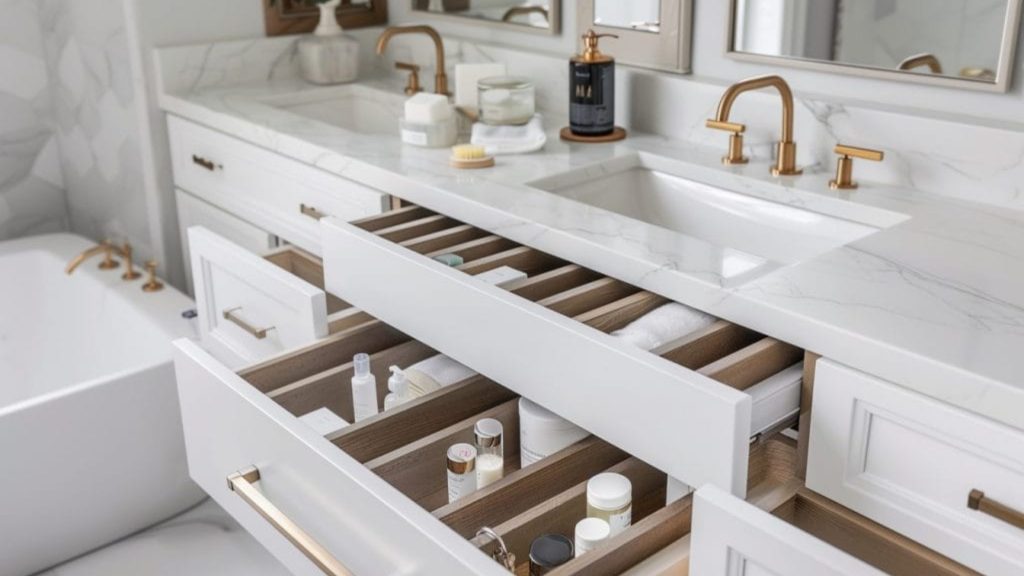
3. Clever Storage Solutions – Maximize your space with clever storage ideas such as over-the-toilet shelving, drawer organizers, and stylish baskets. These simple solutions keep your bathroom neat and organized without taking up valuable floor space.
4. Affordable Decor Accents- Small decor changes can make a big difference. Swap out your old mirror for a new, stylish one, add a few plants for a fresh feel, and update hardware like handles, knobs, and towel bars. These affordable accents help tie everything together while giving your bathroom a polished, updated look.
Step-by-Step Guide to Budget-Friendly Bathroom Updates
A clear plan helps you maximize results while keeping costs under control. Follow this step-by-step bathroom renovation guide to stretch your budget without sacrificing style or quality.
Step 1: Planning & Budgeting

Every successful bathroom remodel begins with clear planning. Begin by identifying essential updates, such as a new vanity, updated lighting, or energy-efficient water-saving fixtures. Prioritize your must-haves over nice-to-haves like heated floors, luxury tiles, or spa-like additions. Once your priorities are clear, allocate your funds accordingly, focusing on the areas that will create the biggest impact.
To avoid unexpected costs, it’s wise to reserve 10-15% of your budget for contingencies. Hidden issues like plumbing, electrical updates, or water damage may arise, and having a financial cushion ensures your project stays on track.
Step 2: Sourcing Materials
You don’t need to overspend on materials to create a stylish bathroom. Take advantage of discount outlets, salvage yards, and clearance sections to find high-quality materials at a fraction of the price. Websites like Facebook Marketplace, or Habitat for Humanity ReStores offer gently used fixtures, vanities, and even tiles. With a little creativity, you can find great deals on items that look brand new.
For flooring and tile updates, consider buying in bulk. Not only will this reduce the cost per unit, but you can also keep extra material on hand for future repairs. If you can time your purchases around seasonal sales or holiday clearance events, you’ll find even deeper discounts from home improvement stores and online retailers.
Step 3: DIY vs. Contractor Work
When it comes to remodeling, knowing which tasks you can tackle yourself and which require a professional can make a huge difference in both cost and results. Simple projects like painting, demolition, installing shelves, or swapping out cabinet hardware are DIY-friendly and can help you save on labor costs.
However, jobs involving plumbing, electrical wiring, or waterproofing should be left to licensed professionals to avoid expensive mistakes. While DIY can save money upfront, hiring an expert ensures safety, compliance with local codes, and long-term durability.
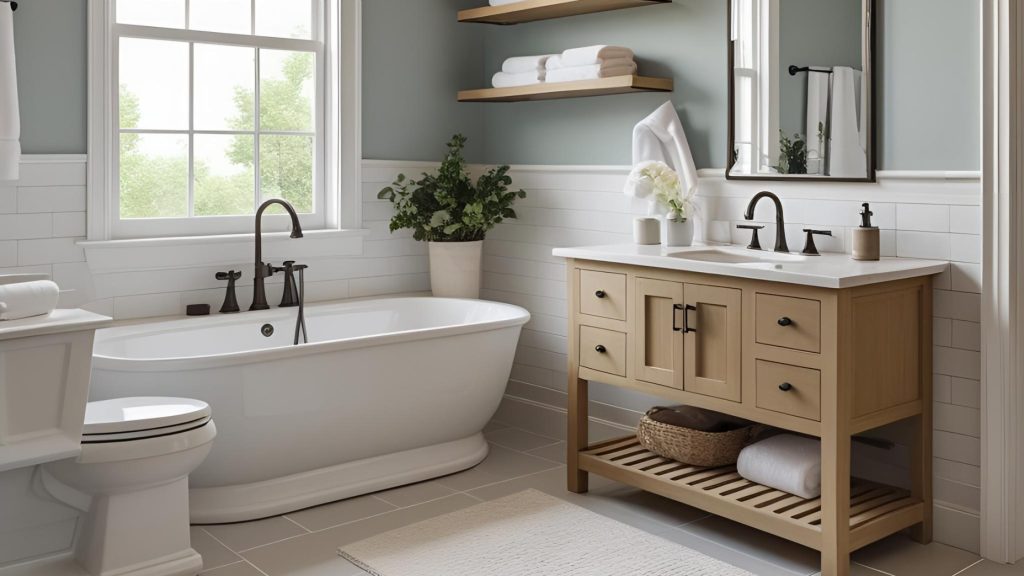
Step 4 : Update Your Shower Area

Your shower area can become the focal point of the bathroom with simple updates that don’t break the bank. Replacing the showerhead with a new, water-efficient model can enhance the experience and help reduce water consumption. Regrouting tiles or adding a fresh coat of grout paint can make your existing tiles look brand new.
For an even more dramatic change, peel-and-stick tiles or a new shower liner can be a quick and affordable way to update an outdated shower area. These materials are easy to apply, and they come in a variety of styles that mimic high-end options like subway tiles or natural stone.
Step 5 : Install a Shower Screen or Curtain
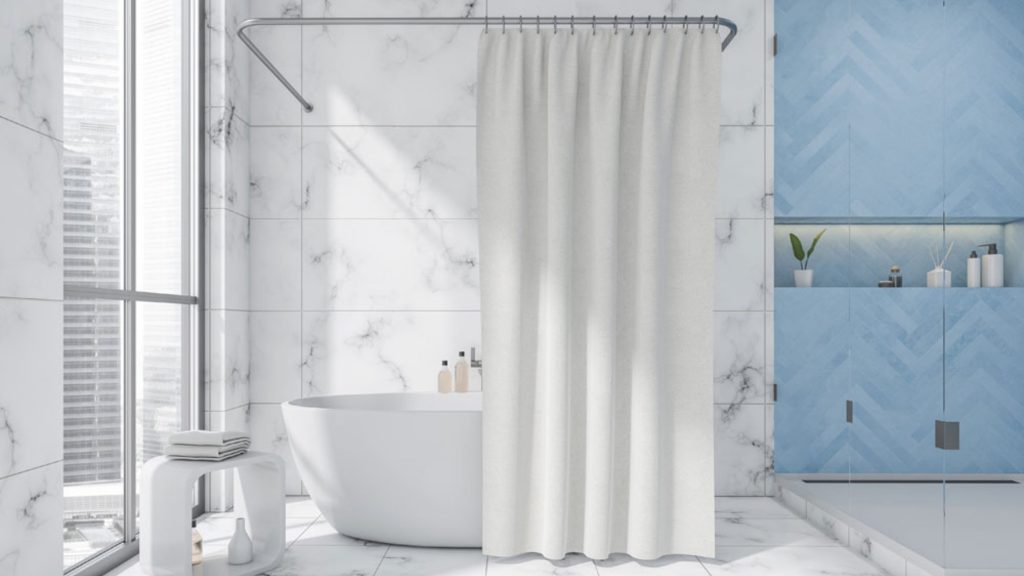
If a full shower renovation is out of your budget, upgrading the shower screen or curtain can still deliver a fresh, modern look. Opt for sleek, minimalistic glass shower screens, which can create the illusion of space, or choose a stylish shower curtain in a bold print or color to add a new focal point to the room. This is a quick, low-cost option that can make a big difference.
Additionally, shower screens are practical, helping to keep water contained and reduce the risk of water damage to your bathroom floor.
Step 4: Finishing Touches
The final step in your bathroom update is adding finishing touches that enhance both style and functionality. Refreshing your grout and caulking around the tub, sink, and shower area not only provides a clean, polished look but also helps prevent water damage. These are small, affordable updates that go a long way in maintaining the integrity of your bathroom.
Incorporating decor such as plants, framed artwork, or trendy textiles (towels, rugs, or shower curtains) is a great way to add personality and warmth without breaking the bank. Indoor plants, in particular, bring natural color and a sense of calm to your space. For lighting, layer task lighting around the vanity with softer ambient and accent lighting to create a balanced atmosphere and improve functionality. Even swapping out outdated hardware (like faucet handles, drawer pulls, and towel bars) for modern finishes can give your bathroom a fresh and stylish makeover at a low cost.
Budget-Friendly Bathroom Renovation Tips
Renovating your bathroom doesn’t have to be an expensive endeavor. By focusing on strategic upgrades and creative solutions, you can create a stylish, functional space without overspending. Below are twelve affordable bathroom renovation ideas that deliver maximum impact without draining your budget.
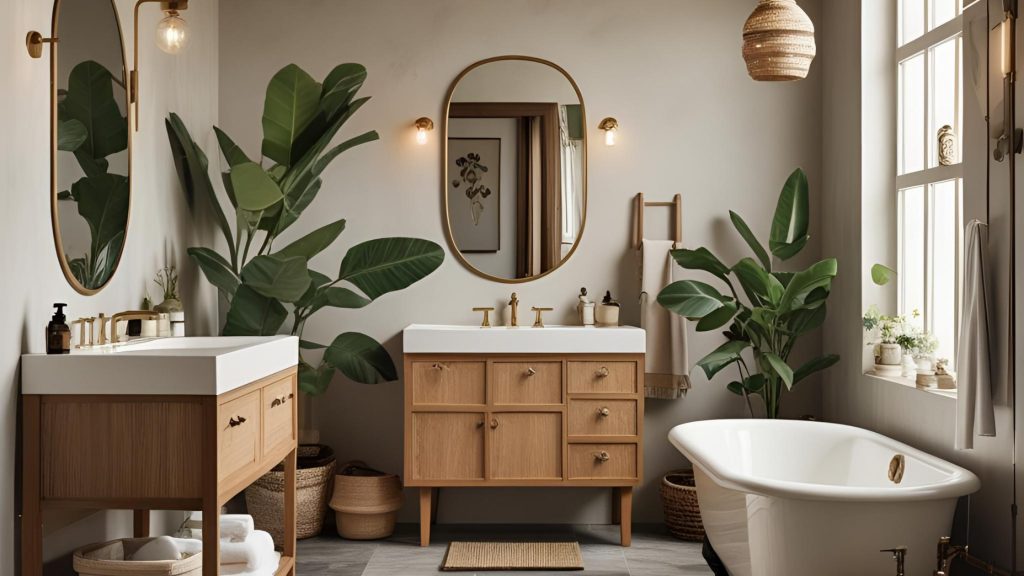
1. Repaint Walls, Cabinets & Vanities
One of the easiest and most affordable upgrades is a fresh coat of paint. Opt for moisture- and mildew-resistant paint to ensure longevity in a bathroom environment. A crisp white or a trendy neutral shade can modernize the look of your bathroom instantly. Instead of splurging on entirely new cabinets, repurposing existing ones with a fresh coat of paint can breathe new life into outdated pieces at a fraction of the cost.
2. Refinish Instead of Replace
Replacing bathtubs, sinks, or tile can run up your costs quickly. Instead, consider refinishing or resurfacing these fixtures. This method typically saves 70–80% compared to full replacement. By restoring the shine and smoothness of old fixtures, you not only get a refreshed appearance but also extend the lifespan of your bathroom elements making this a smart, cost-effective choice.
3. Swap Out Fixtures & Hardware
Small, affordable upgrades can have a big impact on your bathroom’s overall look. Swap out old faucets, showerheads, cabinet pulls, and towel bars with new, stylish versions. Modern finishes such as matte black, brushed nickel, or antique brass can instantly transform the space. These changes are quick, easy, and often inexpensive—helping you achieve a more contemporary vibe without overspending.
4. Use Peel-and-Stick Options

Peel-and-stick tiles, backsplashes, and vinyl flooring are excellent alternatives to expensive stone or ceramic options. These easy-to-install, DIY-friendly products allow you to create high-end looks without the hassle or expense of professional installation. Perfect for renters or homeowners who prefer temporary yet stylish upgrades, peel-and-stick options are both versatile and budget-friendly.
5. Install Energy-Efficient Fixtures
Eco-friendly upgrades are not only great for the environment but also beneficial for your wallet. Consider installing low-flow toilets, water-saving faucets, and energy-efficient LED lighting. These fixtures help reduce water and electricity usage, ultimately lowering your utility bills. Additionally, many states offer rebates or tax incentives for installing energy-efficient products, which can further offset your costs.
6. Upgrade Lighting
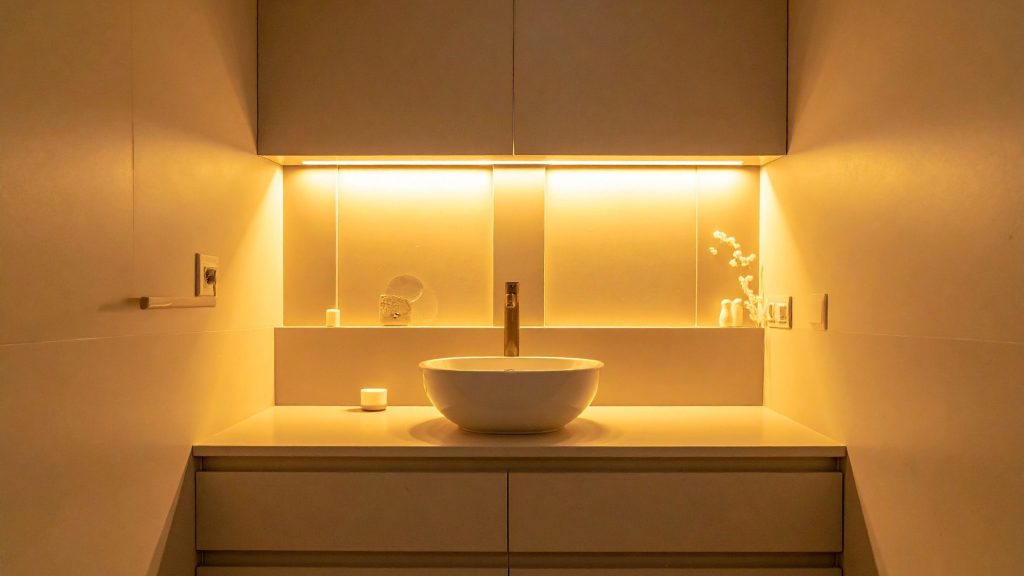
Lighting plays a crucial role in setting the mood and functionality of your bathroom. Swap outdated fixtures with modern, affordable options that offer both style and better functionality. Consider layering your lighting to add depth and versatility combine task lighting around the vanity with soft, ambient ceiling lights and accent lighting to highlight features like artwork or architectural details. This approach not only brightens the space but also makes it feel larger and more welcoming.
7. Add Mirrors for Space & Light
Mirrors are an affordable way to create the illusion of more space and light in your bathroom. A large mirror above the vanity or strategically placed decorative mirrors on the walls can reflect light and make the room feel more expansive. Additionally, mirrors serve a practical purpose, ensuring your bathroom remains both functional and stylish.
8. Maximize Storage with Affordable Solutions
Clutter can quickly make even the most well-designed bathrooms feel disorganized. Maximize storage with budget-friendly solutions like floating shelves, over-the-toilet cabinets, or wall-mounted hooks. Incorporating baskets and bins adds additional storage without the need for custom cabinetry. By using these clever and inexpensive ideas, you’ll be able to keep your bathroom organized and efficient without spending a lot.
9. Repurpose or Upcycle Furniture
Give your bathroom character and charm by repurposing old furniture you already own. A vintage dresser can be converted into a unique vanity, or reclaimed wood can be used for shelving or towel racks. Upcycling not only saves you money but also adds a personalized touch to your space. Plus, this approach is eco-friendly, making it a win-win for your wallet and the planet.
10. Refresh Grout & Caulking
Worn-out grout and cracked caulking can give your bathroom an unkempt appearance. Refreshing grout lines or re-caulking around the tub, shower, or sink can make a huge difference in the overall look of your bathroom. This simple yet effective project is inexpensive and can be completed in just a few hours, giving your tiles and fixtures a polished, renewed appearance.
11. Add Affordable Decor
You don’t need to spend a fortune on high-end decor to create a stylish bathroom. Indoor plants, framed artwork, new shower curtains, or inexpensive rugs can completely change the vibe of your space. These simple additions bring color, warmth, and personality to the bathroom while keeping costs low. A few carefully chosen decor pieces can elevate the overall design without a significant investment.
12. Focus on Small Changes with Big Impact
Sometimes, it’s the smallest changes that make the most noticeable difference. Replace an old toilet seat with a sleek, modern one, add fresh towels in stylish colors, or update your shower rod to something more contemporary. These small touches are easy to implement and can refresh the space with minimal effort and cost.
Conclusion
A bathroom renovation doesn’t have to break the bank. With careful planning, affordable updates, and creative design choices, you can give your bathroom a fresh new look while staying within budget. Simple upgrades like repainting walls and cabinets, refinishing old fixtures, or swapping outdated hardware can create a big impact at a low cost. Adding affordable lighting, mirrors, and storage solutions can also make your space feel brighter, more modern, and more functional.
Whether you’re taking on DIY-friendly projects or selectively hiring professionals for complex tasks, there are plenty of budget bathroom renovation strategies that deliver style without overspending. By focusing on cost-effective solutions and step-by-step planning, you’ll not only save money but also create a bathroom that adds comfort, functionality, and value to your home.
Top Window Styles Homeowners Are Choosing in 2025

In 2025, window styles have become more than functional openings they’re design statements that enhance comfort, curb appeal, and energy efficiency. From smart glass innovations to modern black-framed elegance, the top window styles homeowners are choosing in 2025 blend performance and aesthetics like never before.
Whether you’re planning a remodel or upgrading specific features, choosing the right window style can dramatically improve your home’s value, efficiency, and visual impact. In this guide, we’ll explore the most popular window styles for homes in 2025, including energy-efficient, smart, and modern window options.
Why Window Styles Matter in Today’s Remodeling Projects
Upgrading your windows isn’t just a cosmetic change, it’s a strategic improvement that can deliver significant returns in both function and value. In today’s remodeling landscape, choosing the right window style plays a key role in enhancing your home’s aesthetics, efficiency, and long-term performance.
1. Curb Appeal That Sells

Modern window styles like black-framed designs and expansive picture windows offer instant visual impact. They elevate your home’s exterior, create architectural interest, and increase appeal to prospective buyers especially in a competitive market.
2. More Natural Light and Improved Airflow

Smart window placement and thoughtful design choices help flood your interiors with daylight while promoting better cross-ventilation. This not only reduces your reliance on artificial lighting but also creates a healthier, more inviting living environment.
3. Energy Efficiency That Pays Off

Today’s energy-efficient window styles including those with Low-E coatings, double or triple glazing, and insulated frames can reduce heating and cooling costs by up to 30%, according to Energy.gov. Over time, these savings can significantly offset the initial installation cost.
4. Boosted Home Value

According to the 2024 Cost vs. Value Report from Remodeling Magazine, homeowners can recoup an average of 69–73% ROI on window replacement projects. It’s one of the highest-return investments you can make in a home remodel.
The Top Window Styles Trending in 2025
As homeowners become more design-savvy and energy-conscious, window styles are evolving to reflect both aesthetics and performance. Here are the top window styles dominating U.S. home trends in 2025, blending modern appeal with practical innovation.
1. Black-Framed Windows: Bold, Sleek, and Modern

Bold black frames continue to define contemporary design in 2025. Typically crafted from aluminum, fiberglass, or composite materials, these windows offer striking contrast and a clean, architectural look especially when paired with light exteriors or minimalist interiors.
Why homeowners love them:
- Works across modern, industrial, and farmhouse designs
- Durable and low-maintenance finish resists fading and corrosion
- Enhances the home’s structural lines with a clean, defined border
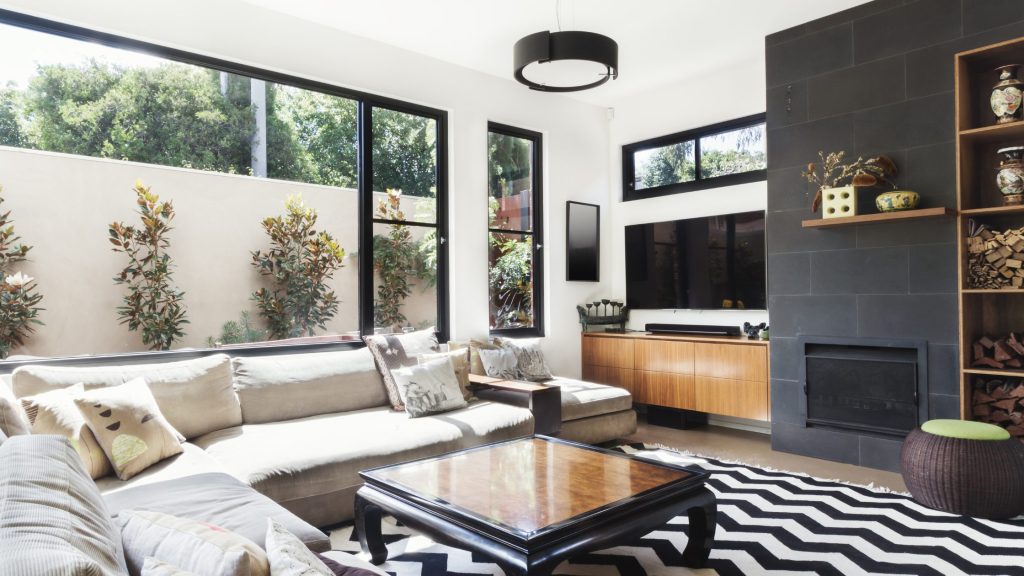
2. Floor-to-Ceiling Picture Windows: Uninterrupted Views

Luxury meets simplicity with picture windows that span floor to ceiling, offering expansive outdoor views and maximum daylight. These windows are fixed, meaning they don’t open, but their impact on design and natural lighting is unmatched.
Ideal for:
- Open-concept spaces with scenic surroundings
- Homes with landscape or waterfront views
- Passive solar heating designs to reduce energy use
3. Casement Windows: Versatile and Energy-Efficient

Casement windows, which open outward with a side hinge, are one of the most energy-efficient window styles in 2025. They seal tightly when closed and allow for full vertical ventilation, making them ideal for various climates and home designs.
Energy highlights:
- Often ENERGY STAR® certified
- Optimal for maximizing airflow and natural cooling
- Creates a tighter seal than sliding or double-hung alternatives, reducing drafts and energy loss
4. Smart Windows: Technology Meets Comfort

As smart home technology advances, smart windows have become a game-changing feature in modern remodels. These dynamic windows can adjust tint, block UV rays, and even operate remotely via apps or voice assistants like Alexa or Google Home.
Key features:
- Automatic or scheduled tinting based on sunlight
- On-demand privacy with switchable glass
- Helps reduce HVAC strain by controlling interior heat and glare
5. Sliding Glass Windows: Clean Lines & Indoor-Outdoor Flow

Sliding windows and doors remain a favorite in 2025 for their sleek look and space-saving function. Ideal for modern homes with decks or patios, they allow for wide, uninterrupted views and easy indoor-outdoor transitions.
Advantages:
- Space-saving design (no inward or outward swing)
- Ideal for maximizing wall openings and natural light
- Available in a range of custom sizes and materials
6. Double-Hung Windows: Classic Meets Customizable

A timeless favorite, double-hung windows feature two movable sashes that slide up and down independently. Their traditional charm makes them a go-to choice for older homes but modern materials and upgrades have made them popular in new builds, too.
Popular in:
- Colonial, Craftsman, and Cape Cod architecture
- Historic restorations where aesthetics and function are both priorities
- Budget-conscious remodels seeking style and performance
Best Window Styles for Different Home Types
Every home has a unique architectural identity and the window styles you choose should enhance, not clash with, that character. Whether your house is sleek and modern, historically inspired, or designed for coastal living, here are the best window styles for 2025 tailored to your home type.
1. Modern Homes: Clean Lines and Smart Functionality

Modern homes emphasize simplicity, efficiency, and high-tech integration. In 2025, homeowners are gravitating toward bold yet streamlined window styles that match the minimalist architecture of today’s modern builds.
Top Window Choices:
- Black-framed picture windows – Create a striking contrast and deliver uninterrupted views that align with open floor plans.
- Smart glass windows – Seamlessly integrate with smart home systems, offering auto-tinting and remote control for light and privacy.
- Casement or sliding windows – Feature slim profiles and smooth operation, ideal for clean, unobtrusive designs.
2. Traditional & Colonial Homes: Timeless Charm, Modern Comfort

For homes with classic architecture like Colonial, Cape Cod, or Craftsman styles the goal is to preserve timeless aesthetics while upgrading comfort and performance.
Top Window Choices:
- Double-hung windows with divided lites – Honor historical design with traditional grille patterns while providing modern functionality.
- Bay and bow windows – Add dimension and elegance, perfect for formal living rooms or front-facing facades.
- Wood-clad or simulated wood frames – Combine old-world warmth with modern insulation and durability.
3. Coastal & Contemporary Homes: Views, Ventilation, and Resilience

Homes near the coast or in high-wind zones need windows that are both visually expansive and structurally resilient. In 2025, the focus is on maximizing views and protecting interiors from sun, salt, and storms.
Top Window Choices:
- Casement windows – Offer excellent ventilation and are ideal for areas prone to strong winds.
- Sliding glass windows with UV protection – Enhance indoor-outdoor flow while blocking harmful rays that can fade furniture and flooring.
- Impact-resistant frames and laminated glass – Designed to withstand extreme weather without compromising style.
Expert Tips for Choosing the Right Window Style

With so many options available, choosing the right window style for your home can feel overwhelming. But a smart selection goes beyond appearance; it ensures year-round comfort, energy efficiency, and long-term satisfaction.
Before finalizing your window installation plans, here are key expert tips to guide your decision.
Ask Your Contractor These 3 Questions:
1. What window styles are best suited to my region’s climate?
2. Which materials will offer the best long-term durability and value?
3. Can I mix window styles without affecting curb appeal?
Also, consider how the window style fits your home’s architecture, lighting needs, and ventilation goals.
Conclusion: Invest in Window Styles That Add Value
As we move through 2025, window styles are no longer a minor design detail; they’re a major influence on how a home performs, feels, and looks. From energy-efficient window styles that reduce utility costs to smart window styles homeowners are embracing for tech-driven convenience, the trends reflect a shift toward smarter, more sustainable living.
Whether you’re drawn to modern window styles 2025 like black-framed picture windows or prefer the timeless versatility of double-hung windows, the right choice depends on your home’s architecture, climate, and long-term goals. Today’s most popular window styles for homes don’t just enhance curb appeal, they add measurable value and comfort. By exploring the top window styles 2025 has to offer, you’re not just following trends you’re future-proofing your home. From minimalist designs to advanced automation, there’s a solution for every home type and homeowner preference.
Ready to bring your vision to life? Contact our team today for expert guidance on choosing the best window styles for modern homes 2025, tailored to your space, budget, and lifestyle.
Need a Roof Upgrade? These 5 Reasons Say Now’s the Time

Your roof is your home’s first shield against harsh weather be it wind, rain, scorching heat, or freezing cold. Yet despite its critical role, it’s often overlooked until visible damage demands attention. From mysterious ceiling stains to sky-high energy bills, the warning signs are easy to miss or ignore. But delaying a roof upgrade can lead to costly repairs, safety risks, and energy inefficiencies.
Upgrading your roof isn’t just about patching leaks, it’s a smart investment in your home’s safety, comfort, and long-term value. In this article, we’ll explore five clear signs that your roof needs replacing and why acting now could save you money, stress, and future headaches.
5 Key Signs You Need a Roof Upgrade
1. Visible Roof Damage (Leaks, Missing Shingles, or Cracks)

If your roof is missing shingles, showing dark streaks, or developing cracks, it’s waving a red flag. Even minor leaks can escalate into major structural issues, leading to costly repairs down the line. Water stains on ceilings, damp attic insulation, or sunlight peeking through the rafters often signal compromised flashing or deteriorated roofing materials. Another warning sign? Finding shingle granules in your gutters is a telltale sign that your roof’s protective surface is breaking down.
Pro Tip: Don’t dismiss curling shingles, cracked flashing, or a sagging roofline. These are signs of aging materials or hidden water damage that demand immediate action.
2. Rising Energy Bills Due to Poor Insulation

If your heating or cooling costs have suddenly increased, your roof might be to blame. Older or damaged roofs often lack proper insulation or ventilation, causing your HVAC system to work overtime. Modern roofing systems with energy-efficient materials like cool roof shingles or reflective metal panels help maintain consistent indoor temperatures and reduce utility bills year-round.
Bonus Benefit: Energy-efficient roofs not only save money but also enhance indoor comfort, especially during extreme weather.
3. Your Roof is Over 20 Years Old

How old is your roof?
- Asphalt shingles: 20-25 years
- Metal roofing: 40-70 years
- Clay or concrete tiles: 50+ years
Even if your older roof looks fine from the ground, time and weather slowly degrade its materials. Older roofs are also less likely to meet modern building codes and energy efficiency standards. If your roof is approaching or past its expected lifespan, it’s better to upgrade proactively than risk a sudden failure during a storm or heavy snowfall.
4. Frequent Repairs Are Adding Up

A leak here, a missing shingle there… if your roof feels like a constant maintenance project, it’s time to take a step back and look at the bigger picture. Regular roof repairs may seem cheaper in the short term, but those costs can quickly add up without solving the root of the problem. Frequent patchwork often indicates deeper issues like water damage, aging materials, or improper installation. And every repair usually comes with added expenses: inspection fees, emergency service charges, or interior damage from repeat leaks.
Why It Matters: Ongoing repairs don’t just hit your wallet they disrupt your life. Constant water intrusion can damage insulation, drywall, flooring, and even electrical systems, leading to further unexpected costs.
5. You’re Planning to Sell Your Home Soon

Thinking of putting your home on the market? Your roof could make or break the sale. Buyers notice the roof first, and a worn or damaged one can raise red flags, cause hesitation, or even reduce offers.
A new roof doesn’t just improve curb appeal it signals that the home is well-maintained, energy-efficient, and move-in ready. That reassurance can help your property stand out in a competitive market.
Did You Know? According to Remodeling Magazine’s Cost vs. Value Report, homeowners can recoup 60–70% of the cost of a roof replacement at resale. In some hot housing markets, a new roof can even drive bidding wars and quicker sales.
Additional Benefits of a New Roof Before Selling:
- Increases appraisal value
- Passes home inspections with ease
- Attracts FHA or VA loan buyers (who may require roof certification)
- Lowers the chances of buyer negotiations or credits at closing
Pro Tip: Pair your new roof with other exterior upgrades like fresh paint or new gutters to create a powerful first impression and maximize your home’s resale potential.
Benefits of Upgrading Your Roof Now
1. Enhanced Protection Against Extreme Weather

Today’s roofing materials are engineered for resilience in the face of increasingly unpredictable and severe weather. Whether you live in a region prone to hurricanes, hailstorms, or heavy snow, a modern roof provides superior protection.
- Impact-resistant shingles (Class 4 rated) can withstand hail and flying debris.
- Metal roofing systems offer exceptional wind resistance—some rated to handle gusts over 140 mph.
- Fire-rated materials (Class A) can slow the spread of flames and are especially beneficial in wildfire-prone areas.
- Advanced waterproofing technologies, such as synthetic underlayments and ice-and-water shields, help prevent interior water damage even during torrential rains.
Bottom line: A roof upgrade means you’re better prepared for the next big storm—and less likely to face costly emergency repairs.
2. Improved Energy Efficiency & Lower Utility Bills

An outdated or poorly insulated roof is a silent energy drain, making your HVAC system work harder year-round. New roofing systems use energy-efficient technologies that regulate indoor temperatures more effectively.
- Cool roof coatings and reflective shingles can lower surface temperatures by up to 50°F, significantly cutting cooling costs in hot climates.
- Proper attic ventilation reduces heat buildup in summer and moisture accumulation in winter, both of which impact energy efficiency and roof health.
- Insulated underlayment and radiant barriers help retain warmth in colder seasons, reducing heating expenses.
Result: You’ll enjoy a more comfortable home and potentially save hundreds per year on energy bills.
3. Increased Home Value & Curb Appeal

A roof upgrade is one of the most visible and valuable home improvements you can make.
- Modern roofing materials come in a variety of colors, profiles, and finishes that can complement or elevate your home’s architectural style.
- Enhanced curb appeal makes a strong first impression on potential buyers, neighbors, and appraisers.
- According to real estate experts, a new roof can boost resale value and attract more qualified buyers, especially in competitive markets.
Fast Fact: A new roof can increase your home’s appraised value by as much as 5–10% and help it sell faster, often with fewer negotiations.
4. Peace of Mind & Long-Term Savings

Beyond the visible improvements, a new roof delivers lasting security and savings.
- Manufacturer warranties typically range from 25 years to lifetime coverage, depending on the material and installer.
- Less frequent repairs and maintenance mean lower long-term ownership costs.
- You gain confidence during storms, knowing your home is well-protected against leaks, wind, and mold-causing moisture.
Added Bonus: Modern roofing systems are easier to inspect, maintain, and clean—saving you time and stress over the years.
How to Know If You Need a Roof Upgrade

Not sure whether your roof needs replacing or just a few repairs? Start with a simple self-inspection to catch early warning signs before they become costly problems. Here’s what to look for:
DIY Roof Check: What to Look For
- Daylight in the Attic: Head into your attic during the day. If you see beams of sunlight peeking through the roof boards, it means there are gaps or holes that need attention.
- Sagging or Soft Spots: Walk around your roof (if safe to do so) and feel for areas that are sagging or spongy. This may indicate water damage or compromised structural support.
- Mold, Mildew, or Moss Growth: Watch for green or black growth along roof valleys or shady areas. These can trap moisture and accelerate the breakdown of roofing materials.
- Granules in the Gutters : Asphalt shingles shed granules as they age. If your gutters are filling up with these gritty particles, it’s a sign your shingles are wearing out and may no longer offer full protection.
Next Steps: When to Call a Professional
If you notice any of these red flags or simply haven’t had a roof inspection in over a year it’s time to bring in a licensed roofing contractor. Most reputable companies offer free or low-cost inspections, along with detailed estimates for repair or full replacement.
Pro Tip: Always ask for a written inspection report and compare at least two to three quotes before making a decision. A trusted professional can help you determine whether minor repairs will suffice or if a full roof upgrade is the smarter, long-term choice.
Conclusion
Upgrading your roof is more than just a home improvement; it’s a smart, long-term investment in your property’s safety, efficiency, and value. As highlighted throughout this article, there are clear signs you need a new roof, including visible damage, frequent repairs, rising energy bills, or simply the age of your current roof. Ignoring these issues can lead to more severe problems like structural damage, mold, or energy loss. On the other hand, the benefits of a roof upgrade are substantial.
A new roof offers enhanced protection against extreme weather, improved insulation, lower utility bills, and increased curb appeal especially important if you’re planning to sell your home. If you’re unsure how to know if you need a roof upgrade, start with a basic inspection and follow up with a professional assessment. Most reputable roofing contractors offer free or low-cost evaluations to help you make an informed decision. Don’t wait for costly damage to occur. Proactive roof replacement ensures peace of mind and adds long-term value to your home.
Ready to take the next step? Contact Best GC today for a free estimate and expert guidance on upgrading your roof with confidence.
Open-Concept vs Traditional Kitchens: Which is Right for your Home?

How to Choose Between Open and Traditional Kitchens
Trying to decide between open-concept vs. traditional kitchens? This comprehensive remodeler’s guide breaks down the key differences, pros and cons, and lifestyle considerations. Whether you’re remodeling or building from scratch, it’s essential to understand each layout’s advantages—from better space flow and natural light to privacy and storage.
Explore how open-concept kitchens foster social interaction, modern aesthetics, and better flow, while traditional kitchens offer focused functionality, extra storage, and classic design appeal. This article also introduces hybrid solutions, real-life examples, and design inspirations to help you strike the perfect balance.
What is an Open-Concept Kitchen?
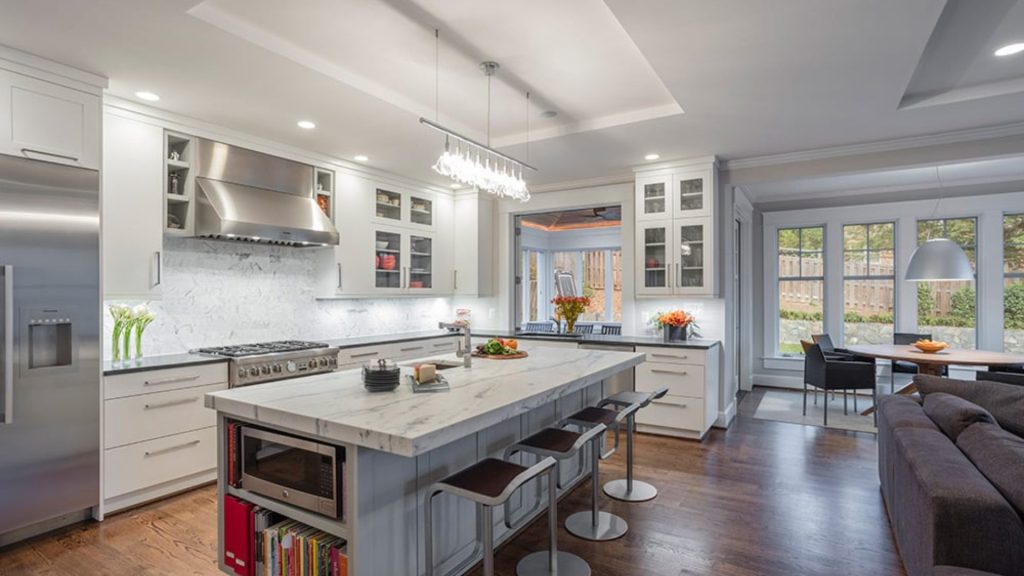
An open-concept kitchen is a modern layout that removes physical barriers like walls or doors between the kitchen and surrounding areas such as the dining room or living room. This seamless integration creates a unified living space that feels larger, brighter, and more connected. Open kitchens are popular in contemporary homes because they promote interaction, enhance visibility, and improve the overall flow of the home.
Key Features of Open-Concept Kitchens:
- No interior walls separating the kitchen from dining and living spaces, allowing for a continuous, cohesive layout
- Expansive kitchen islands that serve multiple functions, from meal prep to casual dining and entertaining
- Abundant natural light due to open sightlines and fewer obstructions between windows and living areas
- Airy, spacious feel that makes even smaller homes appear larger and more welcoming
- Improved social interaction, letting homeowners cook, entertain, and connect with family or guests at the same time
Whether you’re hosting a dinner party or helping kids with homework while making dinner, an open-concept kitchen supports a more connected and interactive lifestyle.
What is a Traditional Kitchen Layout?

A traditional kitchen layout features a defined, enclosed space that is separate from the rest of the home. Designed with function and privacy in mind, this classic kitchen style typically includes walls, doorways, or partitions that create clear boundaries between the kitchen and adjacent rooms. The traditional kitchen emphasizes a more structured workflow, allowing homeowners to focus on cooking without distractions from nearby living spaces.
Key Features of Traditional Kitchens:
- Clearly defined room boundaries, offering separation between cooking and living or dining areas
- Maximized wall space for cabinets, shelves, and appliances, ideal for ample kitchen storage
- Quiet, focused cooking environment, with fewer distractions and interruptions
- Better control of kitchen elements, such as odors, noise, and visual clutter
- Classic design appeal, often suited to formal layouts and timeless interior styles
Traditional kitchens are a favorite for homeowners who value privacy and organization. They also offer a dedicated cooking zone, away from household distractions.
Open-Concept vs. Traditional Kitchens: A Side-by-Side Comparison

Still deciding between an open-concept kitchen and a traditional kitchen layout? Here’s a detailed comparison across five key categories to help you determine which kitchen style aligns best with your home, lifestyle, and long-term goals.
Open-Concept Kitchen
- Space and Layout: Perfect for small homes, apartments, or condos where maximizing space is essential. The open flow makes the kitchen feel larger and more connected to surrounding areas.
- Social Interaction: Ideal for entertaining or multitasking you can watch kids, chat with guests, or host gatherings seamlessly while cooking.
- Design Flexibility: With fewer walls, there may be fewer upper cabinets, but you gain more room for large kitchen islands and multi-purpose furniture.
- Noise and Smells: Because there are no walls, sounds and cooking odors can spread easily throughout the home. High-quality ventilation becomes very important.
- Resale Value: Extremely popular with modern buyers, especially millennials and young families who prefer open living spaces.
Traditional Kitchen
- Space and Layout: Best suited for larger homes where maintaining room separation adds structure and function. It offers more defined zones for cooking and dining.
- Social Interaction: Encourages better focus during meal preparation. Socializing typically happens outside the kitchen area.
- Design Flexibility: Provides ample wall space for extensive cabinetry, creative storage solutions, and customizable layouts.
- Noise and Smells: The enclosed layout helps contain noise and cooking smells, keeping the rest of the home quieter and undisturbed.
- Resale Value: Still appreciated by many buyers, particularly those who prefer traditional layouts or formal dining spaces.
Pros and Cons of Open-Concept Kitchens

Choosing an open-concept kitchen layout offers many advantages, especially for modern living but it’s essential to weigh the trade-offs before deciding. Below is a quick overview of what to expect:
Pros of Open-Concept Kitchens
- Maximizes small spaces: Open layouts create the illusion of more square footage, making apartments and compact homes feel more spacious and open. This is particularly beneficial in modular kitchen design where space efficiency is key.
- Perfect for entertaining and multitasking: Whether you’re hosting guests, helping kids with homework, or watching TV, an open kitchen allows you to stay connected and socially engaged while preparing meals.
- Enhanced natural light and traffic flow: With fewer interior walls, daylight can reach more parts of the home, reducing the need for artificial lighting and improving overall home ambiance.
- Visually unifies interior design themes: Open kitchens allow seamless integration with living room and dining room décor, aligning with popular kitchen interior design trends like modern minimalism and Scandinavian aesthetics.
- Great for families and social households: Parents can supervise children while cooking, and the space naturally encourages group interaction making it ideal for young families or those who entertain often.
Cons of Open-Concept Kitchens
- Lack of privacy and visual separation: Kitchen messes, appliances, and prep areas remain visible from other rooms, which may not suit those who prefer a more polished or formal appearance.
- Noise and cooking smells travel easily: Without barriers, sounds from blenders, timers, or conversations can echo, and odors from food preparation can spread quickly. High-quality ventilation systems are necessary.
- Limited upper cabinet storage: The reduction in wall space often limits options for overhead cabinets, leading to storage challenges especially in homes without a pantry.
- Requires consistent tidiness: Since everything is on display, open-concept kitchens demand a higher level of daily organization and cleanliness to maintain visual appeal.
Pros and Cons of Traditional Kitchens

A traditional kitchen layout emphasizes structure, separation, and functionality. While it may not align with contemporary open-living trends, it continues to offer solid benefits for many households.
Pros of Traditional Kitchens
- More cabinet and storage space: Defined walls provide ample real estate for upper and lower cabinets, pantry areas, and built-in appliances. This supports a wide variety of cooking tools, especially in homes with extensive culinary needs.
- Easier to control clutter, noise, and smells: Kitchen activities stay within the room, reducing disruption to the rest of the house. This makes traditional layouts better for those who cook aromatic or complex dishes frequently.
- Dedicated cooking zone: The enclosed layout allows for focused, efficient meal prep. It’s especially ideal for serious cooks or bakers who appreciate uninterrupted workspace.
- More appliance and layout flexibility: Traditional kitchens are better suited to accommodate larger or multiple appliances like double ovens, built-in freezers, or additional prep sinks.
Cons of Traditional Kitchens
- Reduced social interaction: Being enclosed means the cook is often separated from guests or family members, making it harder to socialize or multitask while preparing meals.
- Can feel closed-off in smaller homes: Without the open flow of modern layouts, traditional kitchens may seem tight or confined particularly in smaller homes or apartments.
- Less adaptable to contemporary floor plans: Traditional kitchens may feel outdated in homes designed with open or flexible living spaces in mind. This can influence resale appeal, especially among younger or first-time buyers.
Choosing Between Open-Concept vs. Traditional Kitchens for Your Lifestyle

Deciding between an open-concept kitchen and a traditional kitchen layout comes down to your daily routines, cooking habits, and long-term home goals. Each layout caters to different lifestyles, so it’s important to reflect on how you use your kitchen space.
Consider the following questions to guide your choice:
- Do you frequently entertain, or do you prefer a quiet, focused cooking environment?
- Is storage a top priority, or are you more concerned with visual openness and flow?
- Do you live in a smaller home or apartment that would benefit from a spacious feel, or a larger home where distinct rooms work well?
- Are you thinking about resale value and appealing to modern homebuyers?
Choosing the Right Fit
Open-Concept Kitchen:
- Ideal if you love entertaining, staying engaged with family while cooking, or want to maximize the feel of space in a smaller home.
- Best for homeowners who value natural light, multi-use areas, and a modern, social atmosphere.
Traditional Kitchen Layout:
- Great for those who prefer privacy, structure, and organization in the kitchen.
- Suits larger homes or anyone who prioritizes ample storage, focused functionality, and visual separation between rooms.
By evaluating your priorities and how you use your home, you can confidently choose the kitchen design style that supports your lifestyle whether it’s open-concept, traditional, or a smart hybrid of both.
Conclusion
When it comes to the decision between open-concept vs. traditional kitchens, there’s no universally perfect answer, only the solution that best fits your space, lifestyle, and design preferences.
Both kitchen layouts offer distinct advantages:
- Open-concept kitchens deliver connectivity, visual space, and modern appeal perfect for entertaining or family living.
- Traditional kitchens offer structure, privacy, and ample storage ideal for those who prioritize functionality and organization.
Whether you’re planning a kitchen remodel in a compact urban apartment or designing your dream kitchen in a spacious suburban home, understanding the pros and cons of open-concept vs. traditional kitchens equips you to make a confident, informed decision that enhances both daily living and long-term home value.
Roof Replacement vs Roof Repair: How to Make the Right Choice

Roof Repair or Replacement: What Delivers More Value?
Deciding between roof replacement vs roof repair is a critical step in maintaining your home’s safety and value. Whether you’re facing storm damage, aging shingles, or frequent leaks, this guide will help you understand the pros, cons, and costs of each option so you can make an informed decision.
This comprehensive guide breaks down everything you need to know to make a smart choice for your home’s protection, energy efficiency, and resale value. From spotting warning signs to understanding costs and benefits, we’ll help you weigh your options confidently. Plus, you’ll get expert tips for roof inspections and maintenance all tailored to your unique situation.
Understanding the Difference: Roof Repair vs. Roof Replacement
When your roof shows signs of wear or damage, it’s essential to know whether a repair will suffice or a full replacement is necessary. Each option serves a different purpose and depends on the age, condition, and extent of the roofing issue.
What is Roof Repair?

Roof repair refers to the process of addressing isolated problems on an otherwise functional roof. Common repair tasks include replacing damaged or missing shingles, sealing leaks, fixing flashing, and patching small areas impacted by weather or aging.
Benefits of Roof Repair:
- Cost-Effective: Repairs are generally more affordable than full replacements, making them a budget-friendly solution for minor issues.
- Quick Turnaround: Most repairs can be completed in a day or two, minimizing disruption to your home.
- Extends Roof Lifespan: Targeted repairs can help maximize the remaining years of an aging roof.
- Ideal for Localized Damage: If the problem is limited to one area like a small leak or storm damage a repair is often the most efficient option.
What is Roof Replacement?

Roof replacement involves removing the existing roofing system down to the deck and installing new materials either due to age, widespread damage, or structural concerns. In some cases, re-roofing (laying new shingles over the old ones) may be an option, depending on local codes and the condition of the existing layers.
Scenarios That Require Roof Replacement:
- Extensive Water Damage or Mold: When leaks go unnoticed or are widespread, moisture can rot the underlying structure and cause mold growth, necessitating a full replacement.
- Roof Age: Most asphalt shingle roofs last around 20–30 years. If your roof is near or beyond its expected lifespan, replacement ensures long-term protection.
- Structural Issues: A sagging roof or compromised decking indicates foundational problems that repairs can’t fix.
- Multiple Repair Attempts: If you’ve had several repairs over the years and issues persist, replacing the entire roof might be more cost-effective in the long run.
- Storm or Hail Damage: Severe weather events can cause widespread shingle loss, granule erosion, or even deck damage, warranting full replacement.
How to Decide: Key Factors That Influence Your Choice

Deciding between a roof repair and a full roof replacement comes down to more than just patching up problems. Here are the key factors to consider when evaluating the best course of action for your home:
1. Age of the Roof
The age of your current roofing system is one of the most critical indicators. Asphalt shingle roofs typically last between 15 to 30 years, metal roofs can last anywhere from 40 to 70 years, and tile or slate roofs may even exceed 100 years with proper maintenance.
If your roof is nearing or has passed its expected lifespan, investing in another repair might only delay the inevitable. In such cases, replacement becomes more cost-effective and ensures long-term protection for your home.
2. Extent and Type of Damage
Not all roof damage is equal. Minor issues like a few missing shingles or small, localized leaks can usually be resolved with quick repairs. However, widespread damage, frequent leaks, water stains across ceilings, or signs of structural sagging suggest deeper problems that repairs can’t solve.
If your roof shows signs of mold growth, water infiltration across multiple areas, or noticeable drooping, it’s a red flag that a replacement is necessary to restore structural integrity and safety.
3. Roof Inspection Results
Hiring a licensed roofing contractor for a professional inspection provides crucial insight. A thorough inspection will evaluate the roof’s structural integrity, ventilation systems, insulation performance, and the presence of moisture or rot.
Based on the results, a contractor can recommend whether targeted repairs are sufficient or if a complete overhaul is needed. Always request a detailed written estimate for both repair and replacement options so you can compare short-term costs with long-term benefits.
4. Budget and Long-Term Home Goals
Your financial situation and future plans for the home will greatly influence your decision. If you’re looking for a budget-friendly, short-term fix especially if you plan to move soon repairs might make more sense. However, if you’re staying in your home for many more years, a roof replacement is a smart investment. It not only reduces ongoing maintenance but can also boost your home’s value, improve curb appeal, and offer stronger protection against future weather events. Think of repairs as a band-aid and replacement as long-term healthcare for your home.
5. Energy Efficiency and Structural Soundness
Old or compromised roofs often contribute to insulation problems, leading to increased energy bills, uneven indoor temperatures, and a less comfortable home environment. Leaks or poor ventilation can also encourage mold and mildew, posing health risks.
A new roof offers modern materials and improved insulation that can significantly increase energy efficiency. It helps your home stay cooler in the summer and warmer in the winter, reduces the strain on your HVAC system, and restores the overall structural stability of your home.
Cost Comparison: Roof Repair vs. Roof Replacement

Understanding the cost difference between repairing a roof and replacing it entirely is essential for planning your budget and making the right decision for your home.
National Averages in the U.S.
- Roof Repair: Typically $150 to $1,500 depending on damage severity. Minor shingle replacements or leak patches cost less, while larger repairs involving flashing or decking may cost more.
- Roof Replacement: Usually ranges from $6,000 to $25,000+, depending on home size, roof complexity, and materials (asphalt, metal, tile, etc.).
Key Factors That Influence Roofing Costs
Several elements can affect the total cost of either a repair or a replacement:
- Roof Size and Pitch: Larger roofs or those with steep slopes are more labor-intensive and expensive to work on.
- Material Selection: Asphalt shingles are usually the most budget-friendly, while metal, slate, tile, and wood shakes come with higher material and labor costs.
- Geographic Location: Labor and material prices vary across regions. For example, roofing costs in coastal or urban areas tend to be higher than in rural areas.
- Labor Costs: Hiring experienced, licensed roofing contractors may cost more upfront but ensures better workmanship and fewer issues down the line.
- Permit and Disposal Fees: Depending on local building codes, you may need permits for roof replacement. Also, old material disposal and cleanup can add to the overall bill.
What About Insurance?
In many cases, homeowners insurance may cover all or part of your roofing costs, but only under certain conditions. Most policies provide coverage if the damage is caused by sudden, unavoidable events—such as hailstorms, high winds, fallen trees, or fire. However, general wear and tear or neglect usually aren’t covered.
To increase your chances of receiving coverage:
- Document the damage with photos.
- Schedule a professional roof inspection as soon as possible.
- Contact your insurance provider promptly and file a claim if applicable.
Pro Tip: Even if you’re not sure the damage qualifies, it’s worth having an expert assess your roof and assist with the claims process.
Pros and Cons: Roof Repair vs. Roof Replacement
Making the right decision starts with understanding the benefits and drawbacks of each option. Here’s a detailed breakdown:
Roof Repair

Roof repair is a practical and cost-effective solution when dealing with minor or isolated roofing issues. It allows you to fix specific problems quickly without the expense or disruption of replacing the entire roof. However, repairs are generally temporary and best suited for roofs that are still relatively new or in good overall condition.
Pros of Roof Repair:
- Lower Upfront Cost: Much more affordable than a full replacement, making it a great option for minor issues or tight budgets.
- Faster Completion: Most repairs can be completed in 1–2 days with minimal disruption.
- Extends Roof Life: Helps prolong the lifespan of a relatively new or mid-life roof.
- Targeted Fix: Ideal for addressing isolated problems such as missing shingles or small leaks.
Cons of Roof Repair:
- Temporary Solution: Repairs only offer a short-term fix, especially on aging roofs.
- Recurring Costs: Multiple repairs over time can add up and may end up costing more than a replacement.
- Limited Structural Impact: Doesn’t address hidden structural issues or underlying damage.
- Minimal Efficiency Gains: Little to no improvement in insulation or energy efficiency.
Roof Replacement

Roof replacement is a more significant investment that offers long-term benefits. It involves removing the old roof and installing a new one, which strengthens your home’s structural integrity, boosts energy efficiency, and increases property value. While the upfront cost and time commitment are higher, a new roof provides peace of mind and protection for decades to come.
Pros of Roof Replacement:
- Long-Term Investment: Provides 20–30+ years of durability and peace of mind.
- Structural Renewal: Allows full inspection and reinforcement of the entire roofing system.
- Boosts Energy Efficiency: Modern materials and insulation can significantly reduce energy bills.
- Increases Home Value: Enhances curb appeal and resale value, making it a smart investment for long-term homeowners.
- Warranty Benefits: New roofs often come with manufacturer and workmanship warranties.
Cons of Roof Replacement:
- Higher Initial Cost: Significantly more expensive than a repair, which may not be ideal for all budgets.
- Longer Project Timeline: Can take several days to a week to complete, depending on size and complexity.
- Permit and Disposal Fees: May require permits and involve costs for removing and discarding old materials.
- Weather Dependency: Scheduling and completion can be affected by bad weather conditions.
Conclusion: Your Roof, Your Investment Make the Right Call
When it comes to roof replacement vs. roof repair, there’s no one-size-fits-all answer. The right choice depends on the age of your roof, the extent of the damage, your budget, and your long-term homeownership goals.
Minor leaks or missing shingles? A repair might be all you need. But if your roof is nearing the end of its lifespan or showing widespread wear, investing in a full replacement could save you money and stress down the road.
The key takeaway? Don’t get a professional roof inspection. It’s the smartest step toward protecting your home’s value, energy efficiency, and structural safety.
Ready to take the next step? Schedule a free roof inspection or estimate today and get expert guidance tailored to your specific situation.